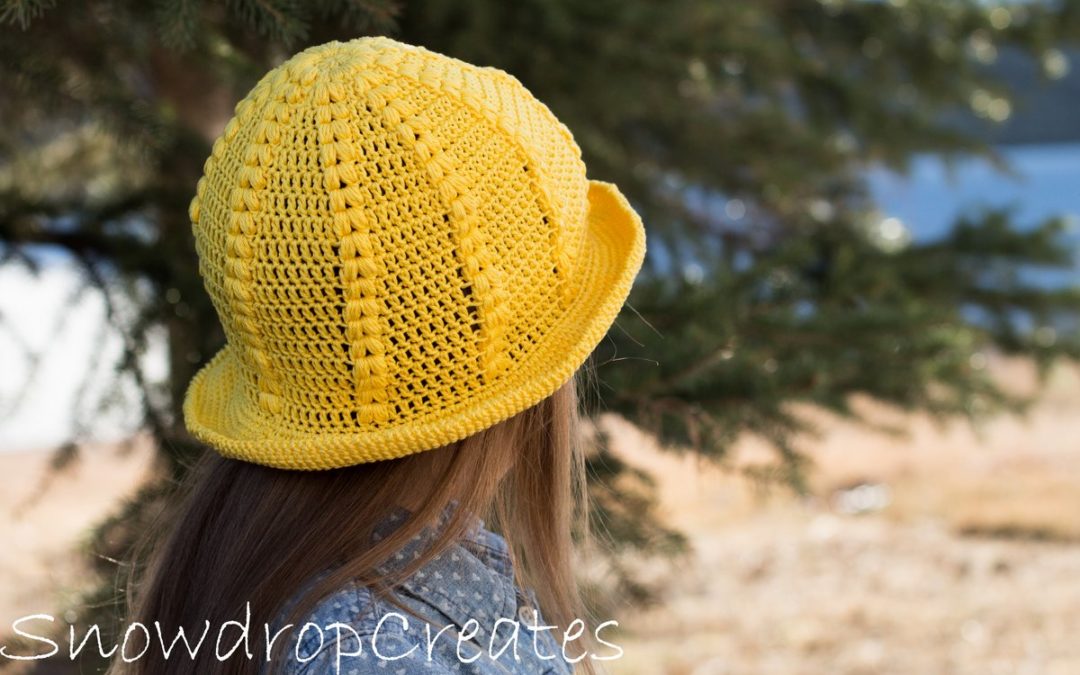
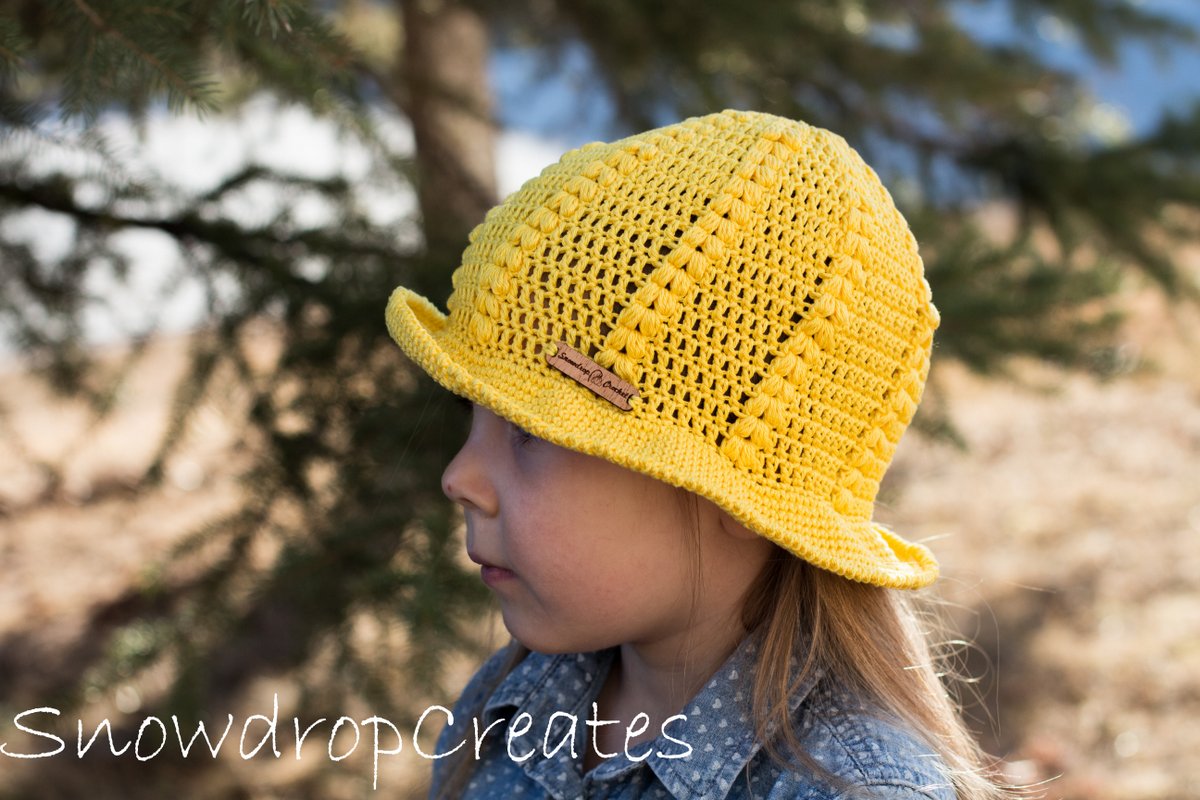
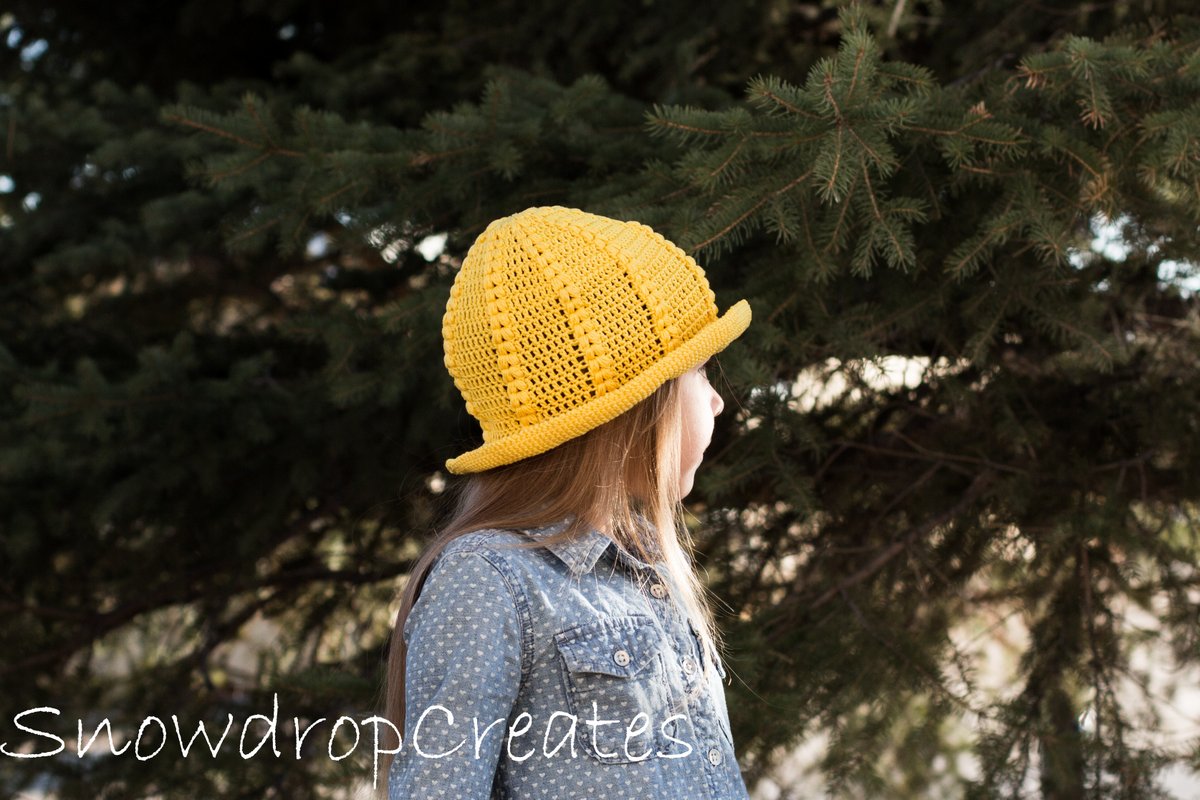
The Daffodil Sunhat has me dreaming of sun and the beach. I cannot wait and am counting the days until we can bathe in the sun and listen to the seagulls, kids playing in the water, the warm sand beneath my feet… I LOVE summer!
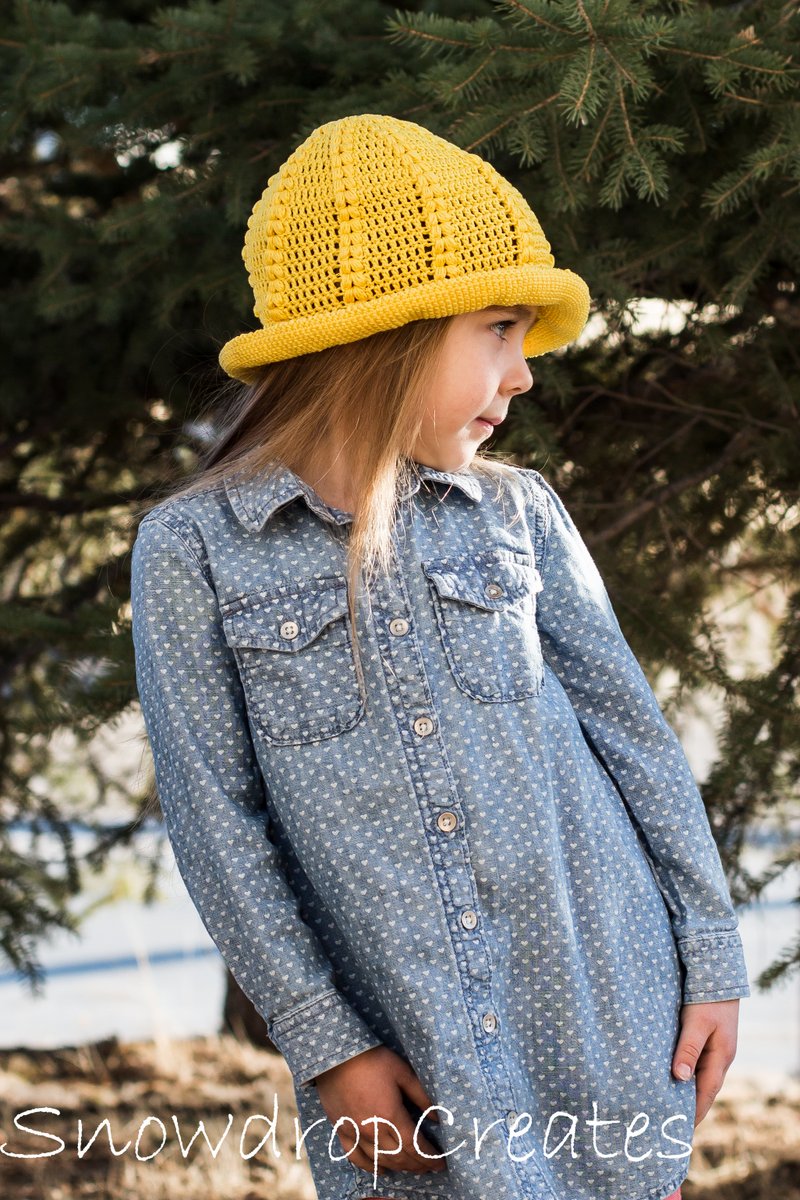
This hat is designed with practicality and style in mind.
– The brim keeps the sun out of the eyes;
– Cotton yarn and lose stitches keep the head from getting too hot;
– The snug and low fit will make sure this hat stays put. (I cannot tell you how many hats we have lost to the wind…);
– Easy to adjust to your needs:
- If you don’t want it to sit so low, just crochet fewer rounds than the pattern suggests before working the brim.
- If you need more shade, keep adding rows to the brim.

Have fun with this pattern and leave a comment! I love getting feedback 🙂
PATTERN:
|
Size: Toddler (18-19” head circumference) Child (20-22” head circumference) Adult (22-23” head circumference)
Gauge: 10 sc/12 sc rows in 2” |
Materials: Yarn: Sport weight yarn. Sample was made in Schoeller & Stahl Limone (136 yards/50grams) (2 skeins) Hooks: D/3.25mm Other: Darning needle to weave in the ends |

Abbreviations:
Ch – Chain(s)
MR – Magic Ring (Loop)
Yo –Yarn Over
Sk – Skip
Chsp – Chain Space
St(s) – Stitch(es)
Slst – Slip Stitch
Sc – Single Crochet
Dc – Double Crochet
Rev.Sc – Reverse Single Crochet or “Crab Stitch”
Special Stitches:
Reversed Single Crochet: Worked just like a Single Crochet, except going towards the right instead of left of fabric. The Rev.sc is worked “backwards”.


Puff Stitch: (Yo, insert hook into stitch indicated, pull up a loop to height of hook) 4 times, yo, pull through all but last loop on hook, yo pull through last 2 loops.


Notes:
- Ch2 at the beginning of each round does not count as a stitch.
- Always join to first st of the round.
- DO NOT TURN your work after each round.
Instructions:
Crown:
Make a MR.
Round 1: Ch2, dc 9 into MR, join to first dc.
Round 2: Ch2, (puff st, ch, puff st) 9 times, join to first puff st.
Round 3: Ch2, *dc in first puff st, (puff st, ch, puff st) in chsp, sk next puff st; repeat from * 8 times, join.
Round 4: Ch2, *dc, dc in first puff st, (puff st, ch, puff st) in chsp, sk next puff st; repeat from * 8 times, join.
Round 5: Ch2, *dc 2, dc in first puff st, (puff st, ch, puff st) in chsp, sk next puff st; repeat from * 8 times, join.
Round 6: Ch2, *dc 3, dc in first puff st, (puff st, ch, puff st) in chsp, sk next puff st; repeat from * 8 times, join.
Round 7: Ch2, *dc 4, dc in first puff st, (puff st, ch, puff st) in chsp, sk next puff st; repeat from * 8 times, join.
Round 8: Ch2, *dc 5, dc in first puff st, (puff st, ch, puff st) in chsp, sk next puff st; repeat from * 8 times, join.
Stop increasing for toddler sized hat.
Round 9: Ch2, *dc 6, dc in first puff st, (puff st, ch, puff st) in chsp, sk next puff st; repeat from * 8 times, join.
Stop increasing for child sized hat.
Round 10: Ch2, *dc 7, dc in first puff st, (puff st, ch, puff st) in chsp, sk next puff st; repeat from * 8 times, join.
Stop increasing for adult sized hat.
Body:
Round 1: Ch2, *dc 6, 7, 8, sk next puff st (puff st, ch, puff st) in chsp, sk next puff st;
repeat from * 8 times, join.
Repeat this round until the hat measures approximately 6.5, 7, 7.5“, or to desired length.
Brim:
Round 1: Ch1, sc in each st around, join. (Do not sc into chsp, but DO sc into puff sts.)
Round 2: Ch1, 2sc in each st around, join.
Round 3: Ch1, sc in each st around, join.
Repeat round three 4, 6, 8 more times or until the desired width of the brim is achieved.
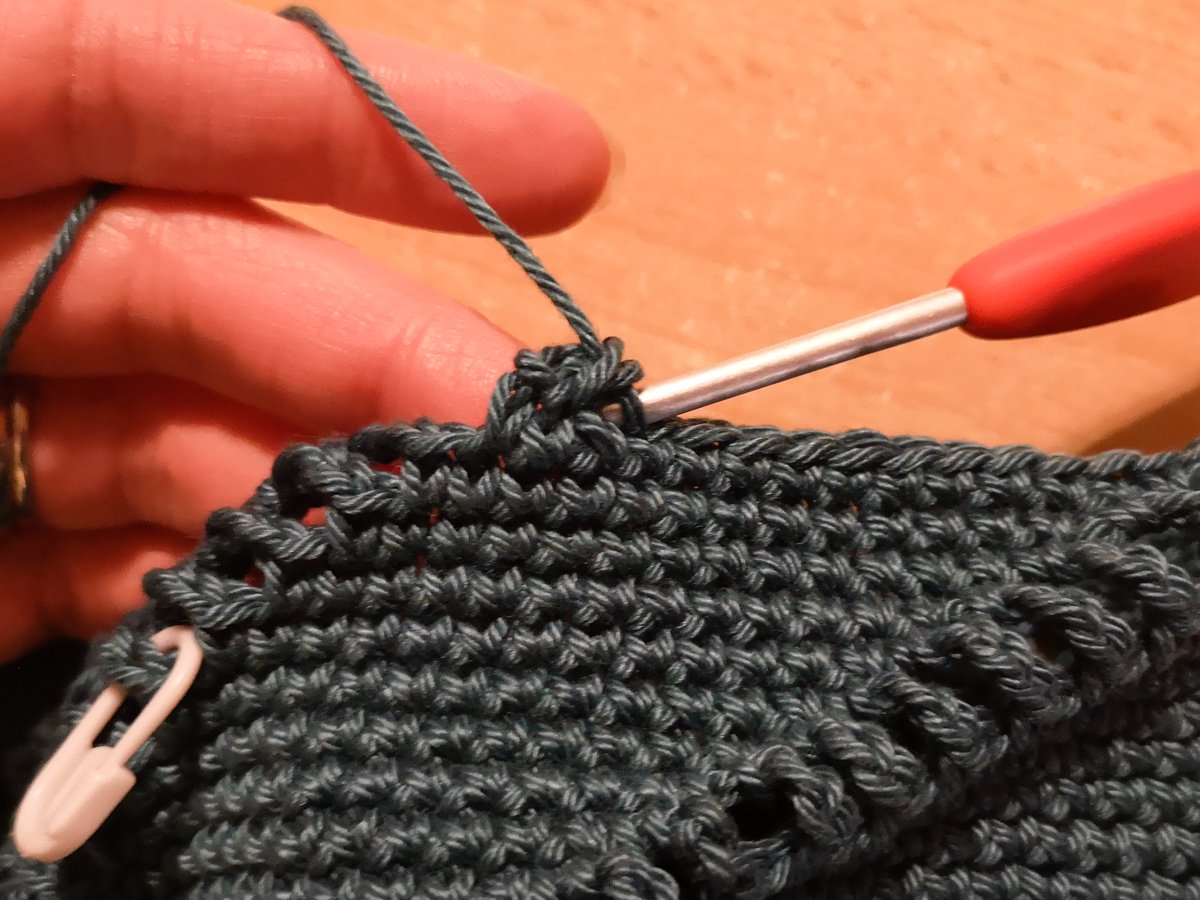
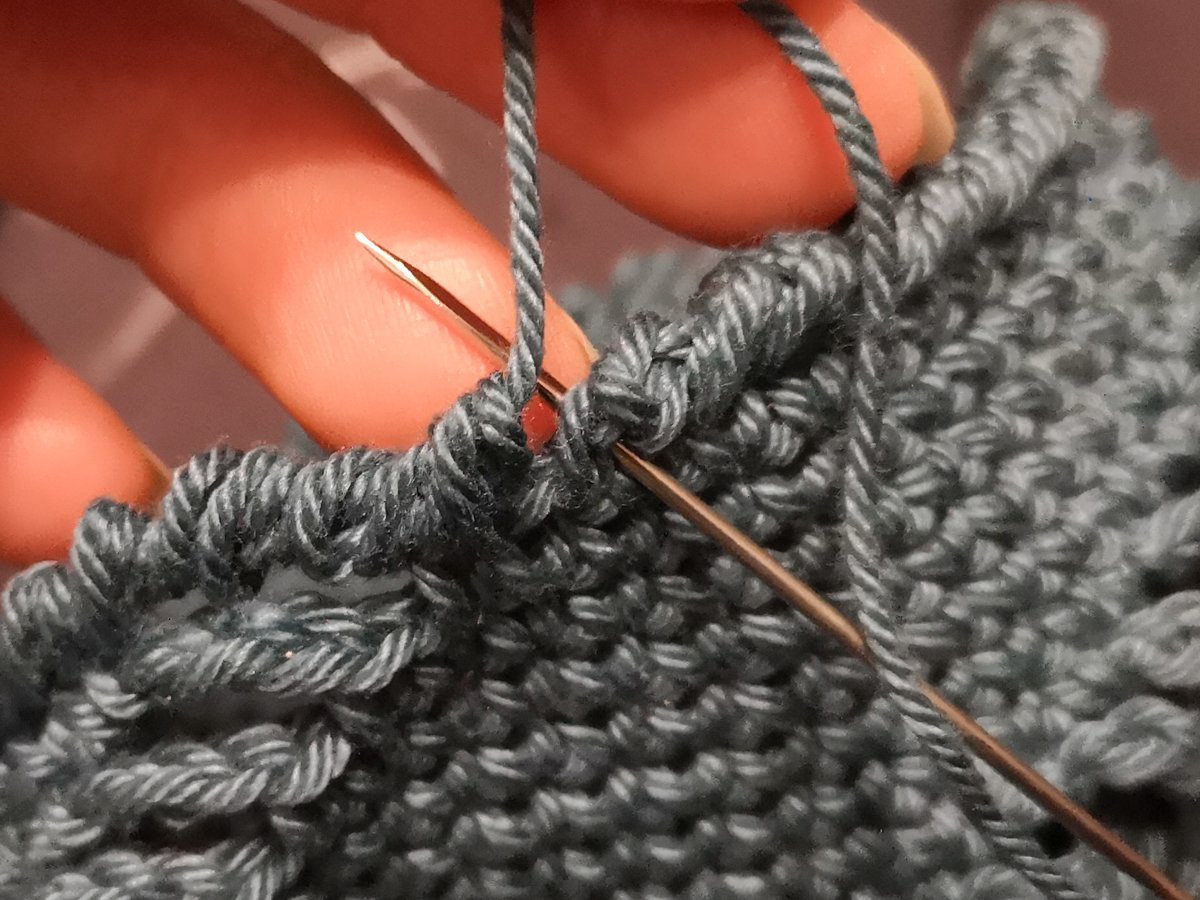
Finishing round: Ch1, (rev.sc into stitch to the right) around.
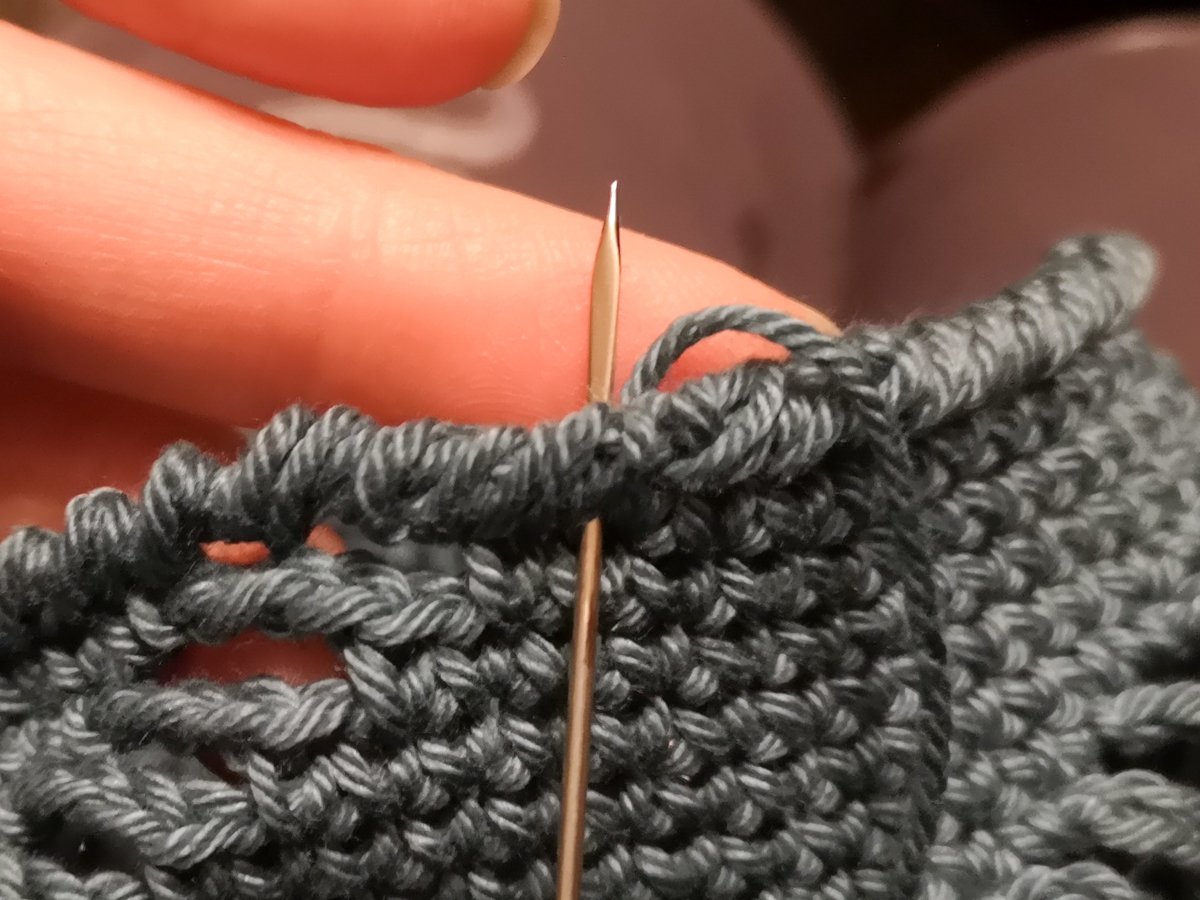
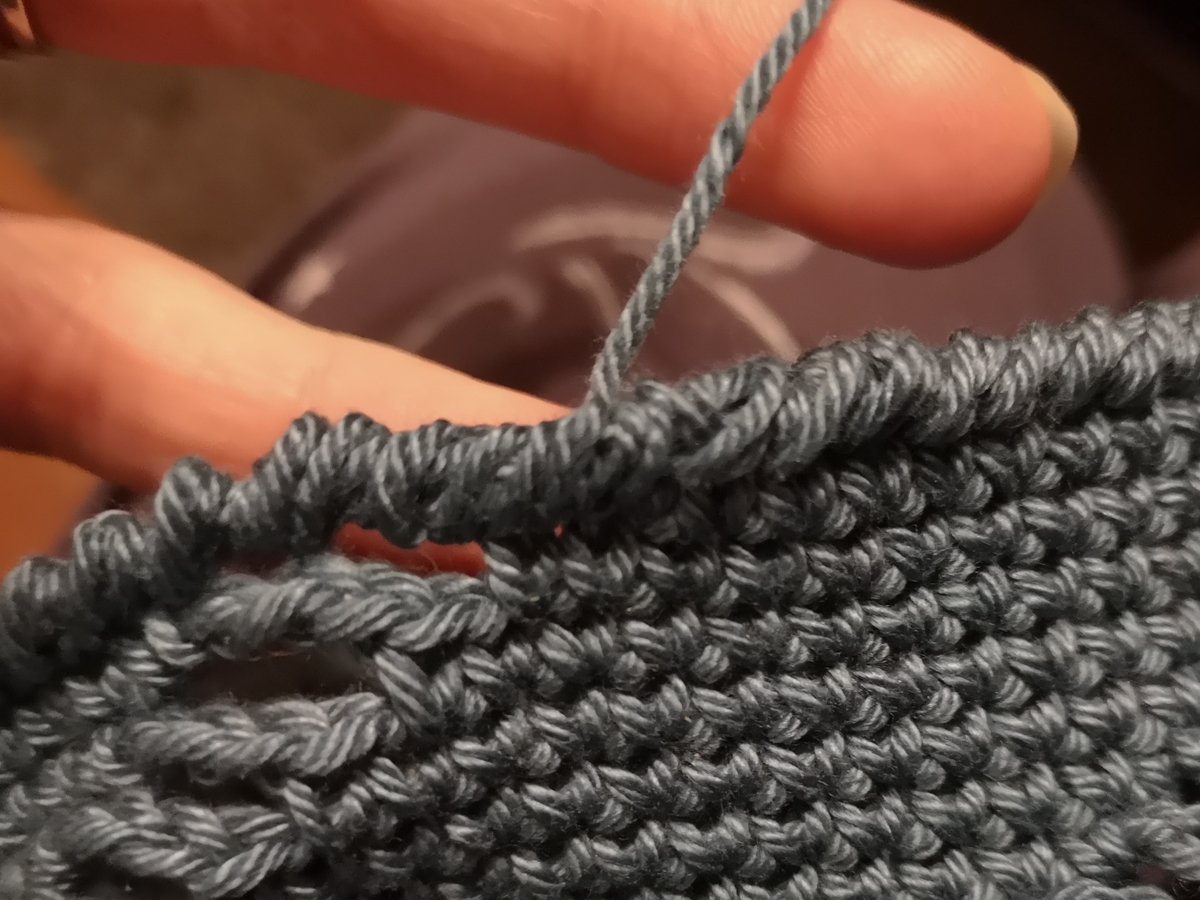
At the end of the round, cut yarn and thread yarn end through needle. Put needle from front to back into first st of the round (pic1). Put needle from front to back again but through last stitch of the round (pic 2). You should have a neat invisible join now, and can secure/weave in all ends (pic 3).
You’re done!
Thank you so much for your visit! Be sure to subscribe for a new FREE pattern every week and follow me on Social Media 🙂
If you would like to get the downloadable PDF version of this pattern, you can find it here on Ravelry
Have a happy, crafty weekend and until next week!
Emma
Such a sweet sun hat! Love the design!! Thank you!
Thank you, Darlene 🙂