Select Page
Jack and Jill Socks

Jack and Jill Socks

Ladies and Gentlemen of the Crochet Community,

have you ever looked at all the awesome knit socks people are making and thought to yourself any or all of the following:

  • WHY can I not crochet a nice, cozy, warm, functional, beautiful pair of socks?! My feet are in need of love and warm sock hugs, too! 
  • I wish I knew how to knit, you just can’t crochet functional socks like that.
  • I never wanted handmade socks anyway…

Well, I am here to tell you that your calls and questions have been answered! It is possible to make crochet socks that can be worn as socks, rather than slippers!! (Insert gasp.)

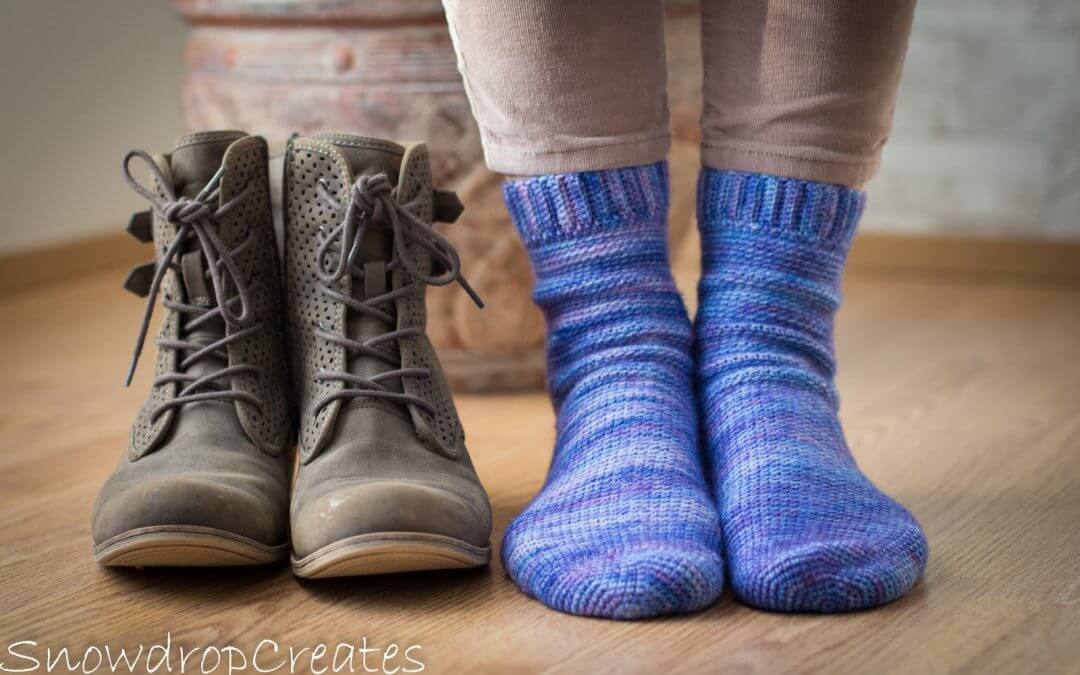
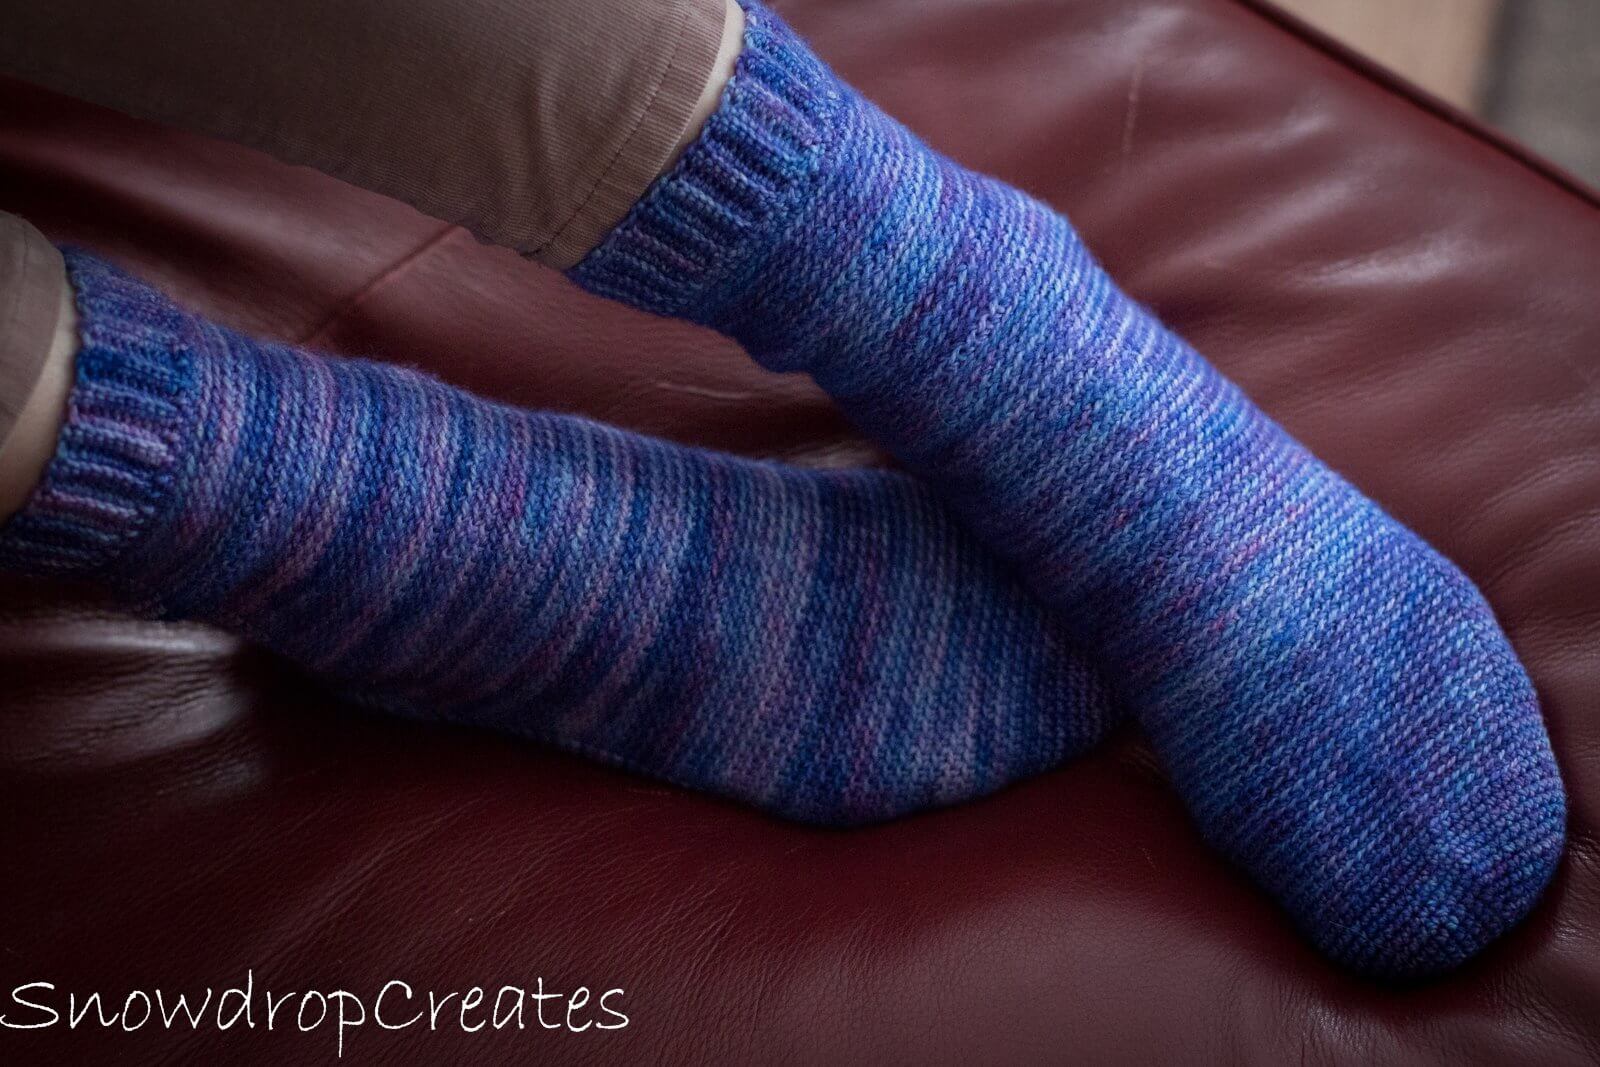
After months of crocheting, frogging, calculating, and finally testing this pattern in a group setting, I am so happy and excited to present to you the Jack and Jill Crochet Socks!!!


Here is the scoop:

  • This pattern comes with FIVE SIZES!!! Therefore, they are great for both men and women, hence the name.
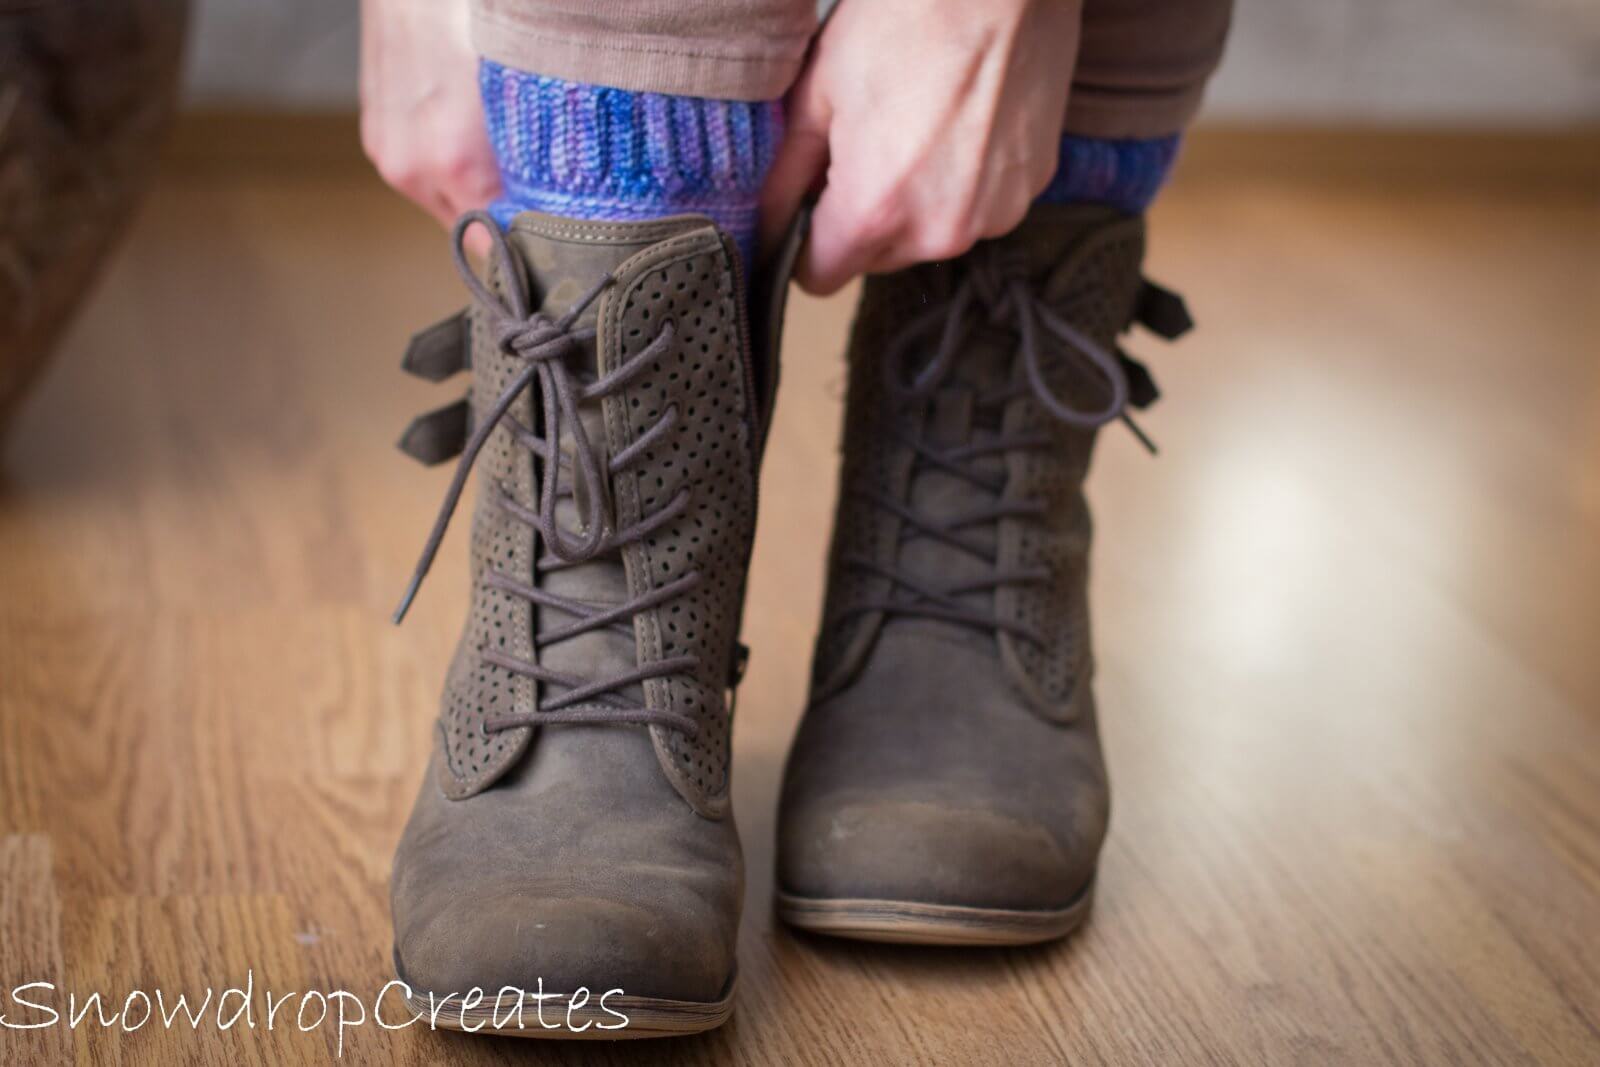
  • The heel has a unique construction method that makes it padded for more durability, while at the same time thin enough to wear in your favorite boots!
  • There are detailed instructions on how to get the perfect fit for your foot, every time (because, we all have different feet). AND, if that weren’t enough,
  • There are VIDEO instructions for the tricky bits (say whaaaaaaaaaat)!!!


The pattern is available on Ravelry and Etsy.  


The samples were made with Knitpicks Hawthorne sock yarn. Testers have been making these with all kinds of different yarns, and they worked well as long as they were similar to this in content and weight. 

I can’t wait to see allllll the crochet socks! Please share with me on Instagram, Facebook, Ravelry! 🙂


Have fun with this pattern!

Love,

Emma

Spiderwalk Blanket and Yarn Review

Spiderwalk Blanket and Yarn Review

Hello Friends. I realize that January is almost over but would still like to say: HAPPY NEW YEAR!!!

Let’s start the year right with a FREE pattern. It is not a hat this time 😉 The wonderful people from www.yarncanada.ca have asked me to review the new Lion Brand Mandala Tweed yarn, and of course I had to take the opportunity to write up a new pattern as well. You will find it further down right after I share my thoughts on this new yarn.

The Review


First off, let me just say that the colors of this yarn are just awesome. They fade beautifully from one to the next and sometimes, there will be a more unexpected combo in between, which makes it fun to work up and look at. 

Each yarn cake contains 200gr of yarn and the size makes it an economical choice! This blanket used up only two cakes of yarn, which also means very few ends to weave in! (We all know that that is really what it comes down to, right?!)

You might notice that there is very little repeats of color combo. It was interesting to see that two cakes of the same color name looked completely different, but worked together beautifully.

I did notice that the twist was a bit loose, which would make it harder to work up with a small hook. Nonetheless, it was easy to crochet with and easy to frog (I wish I didn’t have to find out that part, LOL)

So, to sum it up:

– The Lion Brand Mandala Tweed Yarn is a great yarn for blankets, cowls, pillows, and other projects that will showcase the beautiful changes of colors.

– It might also work for some garments, though would not be my first choice for this.

– It washes well and can be blocked to shape if not crocheted too tightly. 

– It is an economical choice due to the large cakes for a good price.

– Large cakes also make for less ends to sew in. (This should really be the first and only reason why this is awesome hahaha)

– A little loose, but easy to work with.

– The large scale ombre is beautiful and the color combos are fun.


I am so grateful for the opportunity to test this yarn, and my husband is happy we finally have a nice blanket in the living room….ahem. 

*Please note that I was not paid for this review, other than receiving the yarn to test, and that these opinions are based on my true experience when using it.* 


And finally, the pattern!


Yarn: Lion Brand Mandala Tweed 2 cakes

Hoock 5.5mm (6.00mm will also work)

Gauge: 3″ per pattern repeat (dc3, ch3, sk3, sc3, ch3, sk3)

Size:  36″x49″


NOTES:

– To make a bigger/smaller blanket, add or subtract in increments of 12. NOTE that more or less yarn will be needed, respectively)

– The hook size is not super important. Pick the one that is most comfortable, just be aware that the dimensions will change.


CH 150

Row 1:      dc in 4th ch from hook and each ch throughout.

Row 2:      ch3 (counts as stitch throughout), dc in next 2 sts, *ch3, sk3, sc in next 3 sts, ch3, sk3, dc                     in next 3 sts;repeat from * to the end of the row.

Row 3:      ch1, sc in next 3 sts, *ch3, sk3, dc in next 3 sts, ch3, sk3, sc in next 3 sts; repeat from * to                     the and of the row. (put the last st of the row on top of beginning ch)


 Repeat rows 2+3 until almost all the yarn is used up, or to desired length.

Last row: ch3, dc in each st and chain throughout to finish off your blanket.


Weave in all ends. For even edges, block your blanket into shape. 


I hope you enjoy this free pattern and let me know how you like the new Mandala Tweed yarn. Leave me a comment, I love to hear from you 🙂 And don’t forget to sign up to never miss a free pattern!


Till next time!

Emma


Petite Picot Headband

Petite Picot Headband

It has been a whirwind of a year so far, and the Year of Hats project on my little blog had to take a short break because life happened. But I am back and fully intend to finish this project! I will not stop until there are 52 FREE hat (or headband) patterns on this site. How awesome will it be to have a one-stop-source for all the head coverings you want to make?!


Get your yarn for the Petite Picot Headband here

To ease us back in there is another headband pattern for you today. The Diamonds Headband is by far your most favorite pattern, so I thought I would make another quick pattern just in time for all those fall craft shows and gift season! Just like the Diamonds headband, it is super easy and quick to make, uses less than one skein of yarn for any size (60gr for adult size!!!), and is perfect for gifts, stocking stuffers, selling on fairs…

This pattern includes three sizes: Toddler, Child, Adult. If you would like instructions on how to adjust this headband to any size, I have included those in the PDF version that is available on Ravelry for a buck 😉

Sooo, without further ado, here is your pattern:


Size:

Toddler (18-19” head circumference)

Child (20-22” head circumference)

Adult (22-23” head circumference)


Gauge: 7.5 sts/8 rows (in pattern) in 2”

Materials:

Yarn: Worsted weight yarn.

Sample was made in KnitPicks Brava

(218 yards/100grams) 25-60gr

Hooks: H/5mm

Other: Darning needle to weave in the ends

Abbreviations:

Ch – Chain(s)

Yo –Yarn Over

St(s) – Stitch(es)

Slst – Slip Stitch

Sc – Single Crochet

RS – Right Side


Notes:


  • The headband is crocheted in rows, and then sewn together at the short ends. Always turn your work after each row;
  • Ch1 at the beginning of the row does not count as a stitch;
  • A join is always worked as a slst;

Special Stitch:

Picot:         Insert hook into st indicated, pull up a loop. (Yo, draw through 1 loop on                                         hook) 3 times, yo and pull through both loops.


Instructions:

Ch 60, 68, 76; or until chain can be put around the head, and the number is even.


Row 1:         Sc in second ch and each ch across, turn; (59, 67, 75 sts)

Row 2:         (RS) Ch1, sc in first st, (picot in next, sc in next) repeat to end of row, turn

Row 3:         Ch1, sc in each st, turn

Row 4:         Ch1, sc in first 2 sts, picot in next, (sc in next, picot in next) repeat until                                          two sts remain, sc in last 2 sts, turn

Row 5:         Ch1, sc in each st, turn


For toddler size, repeat rows 2-5 one more time.

For child size, repeat rows 2-5 two more times.

For adult size, repeat rows 2-5 three more times.


Fold the band in half so the short ends meet right sides together. Ch1, slst or sew along the short rows.

Turn so the beginning ch is on top. Ch1, sc in each unworked loop from the beginning ch. Join, cut yarn.

Turn around so the last worked row is on top. Join yarn, ch1, sc in each st. Join, cut yarn.
Weave in all ends.


You’re done 🙂

The downloadable PDF version of this pattern includes instructions on how to adjust this headband to any size!

You can find it here on Ravelry

I hope you have lots of fun with this pattern, and share with me on Social Media: Tag me and use hashtags #snowdroppetitepicot #snowdropcrochet #petitepicotheadband to be featured! 

Don’t forget to subscribe! There is a new free hat pattern released every week! 


Have a happy, crafty weekend and until next time!

Emma

Disclaimer: This post contains affiliate links.

This means that at no additional cost to you, I might earn a small commission if you choose to click through and make a purchase. 

Firefly

Firefly

Hello Friends,

It is Friday once again! Week 25 of our Year of Hats. 

We are having the craziest time over here. So. Much. To. Do. and SO little time to do it all! Mostly because our little stinker is truly a handful and has to be watched at all times. Who knew that a boy would be so much more exhausting than my three girls ever were?! Or does it just feel this way because back then I never tried to write patterns and get stuff done??? Whatever the case may be, I am happy that summer break has now started and I have a “little” help. 

The Firefly hat is just so pretty, don’t you think? I love hats for all seasons because they make a great accessory, and this is the perfect accessory hat. Accessory hats don’t get enough attention in my opinion. The colours of the Knitpicks Chroma yarn are all beautiful, and the Lupine, which was used for this sample, is no exception! Check out all their colourways some time, they are incredible. 

PATTERN:

Size:

Adult (22-23” head circumference)

*See below for size adjustments


Gauge: 11sc in 2” in band

Materials:

Yarn: Fingering weight yarn.

Sample was made in KnitPicks Chroma Fingering (70% Wool, 30% Nylon)(396 yards/100grams) Colorway Lupine (1 skein)

Hooks: F/3.5mm & G/4mm

Other: Darning needle to weave in the ends

Abbreviations:

Ch – Chain(s)

Chsp – Chain Space

Yo – Yarn Over

St(s) – Stitch(es)

Sk – Skip Stitch

Slst – Slip Stitch

Sc – Single Crochet

Dc – Double Crochet


Special Stitches:


Puff:  *Yo, insert hook in stitch indicated, yo and pull up a loop; repeat from * 2 more times, yo and draw through all 7 loops on hook.

Notes:

  • Always join with a slst where indicated.
  • Wool is very stretchy and can be stretched even more at the blocking stage. Be careful not to make it too loose.


*How to adjust for different sizes:        

Add or subtract to the beginning chain the number of stitches you need to fit it comfortably around your hat. If you only have a measurement, add chains until it is about an inch shorter than the wearers head circumference. This pattern will work for any stitch count that is EVEN numbered. Remember that wool is very stretchy.

Instructions:


Band:

With 3.5mm hook, ch 100. Join to first ch, being careful not to twist the chain.

Round 1.      Ch1, sc in each ch, join to first sc. (100 sts)

Round 2:      Ch1, sc in each st around, join.


Rounds 3-5:  Repeat round 2.


Body:

Switch to 4mm

Round 1:      Ch2, puff in first st, ch1, sk1, *puff in next st, ch1, sk1; repeat from * all the way                                    around, join to first puff. (50 puffs)

Round 2:      Ch3, puff in first chsp, *ch1, puff in next chsp; repeat from * around until last chsp, join                        to hole created by beginning ch. 

Round 3:      Ch2, puff in first chsp, ch1, *puff in next chsp, ch1; repeat from * all the way around,                       join to first puff.

Rounds 4-27:   Repeat rounds 2-3.

Round 28:    Repeat round 2. (Or to desired length)


Decrease:

Round 1:      Ch2, puff in first chsp, ch1, (puff in next chsp, ch1) 3 times, sk 1 chsp, *(puff in next                       chsp, ch1) 4 times, sk 1 chsp; repeat from * all the way around, join to first puff.


Round 2:      Ch3 , puff in first chsp, (ch1, puff in next chsp) 2 times, sk1 chsp, *(ch1, puff in next                              chsp) 3 times, sk 1 chsp; repeat from * all the way around, join to hole created by                                  beginning ch.

Round 3:      Ch2, puff in first chsp, ch1, (puff in next chsp, ch1) 1 time, sk 1 chsp, *(puff in next                                chsp, ch1) 2 times, sk 1 chsp; repeat from * all the way around, join to first puff.


Cut yarn, leaving a long tail. Weave yarn end through remaining stitches, pull hole closed and secure/weave in end.

Finishing:

Join yarn to the beginning ch of the hat. Ch1, sc in each unworked ch around the band, join to first sc.

Cut yarn and weave in all ends.


Block your hat for best results. Careful not to stretch the band beyond your head circumference!


You’re done 🙂


If you would like to get the downloadable PDF version of this pattern, you can find it here on Ravelry.

Have a wonderful day and don’t forget to subscribe! There is a new free pattern coming out every week 😀


Emma

Waves

Waves

Week 24 of the Year of Hats. Almost halfway through!

This weeks hat was inspired by the Rocky Shore hat, and uses one of my all-time favourite yarns: KnitPicks Gloss DK! It is easy to work up with a stunning pattern and will keep you engaged while crocheting. I love the final result and hope you do, too! 

Enjoy!

Sizes:


Toddler (18-19” head circumference)

Child (20-21” head circumference)

Adult (22-23” head circumference)


Gauge: 12sc &10 rows in 2”

           (measured in the band)


Materials:


Yarn: DK weight yarn.

Sample was made in KnitPicks Gloss DK (70% Merino Wool, 30% Silk)(123 yards/50grams)

(2, 2, 3 skeins)

Hooks: F/3.75mm & G/4.00mm

Other: Darning needle to weave in the ends

           Pompom


Abbreviations:

Ch – Chain(s)

St(s) – Stitch(es)

Yo – Yarn Over

Slst – Slip Stitch

Sc – Single Crochet

Dc – Double Crochet

Sc2tog – Single Crochet Two Together

Fpsc – Front Post Single Crochet

Fpsc2tog – Front Post Single Crochet 2 Together


Special Stitch:


FPSC: Insert hook from right to left around the post of the stitch indicated. The stitch will now be “in front” of your hook (pic1). Yo and pull up a loop (pic2), yo and pull through both loops on hook (pic3).


FPSC2TOG: Insert hook from right to left around the post of first stitch, draw up a loop, insert around next post, draw up a loop, yo and pull through all three loops on hook.


Notes:

  • The chain at the beginning of each round does NOT count as a stitch;
  • Always join with slst to the first stitch of the round, NOT the chain;
  • Turn your work after each row/round;
  • The pattern rounds are worked on the WRONG side of your hat, that way the pattern will later be on the right side;


Instructions:


Band:

With F/3.75mm hook, ch 6, 8, 10


Row 1:    Sc in second ch and each ch throughout, turn (5, 7, 9 sts)

Row 2:    Ch1, sc in first st, sc in blo of next (3, 5, 7) sts, sc in last st, turn


Repeat row 2 until you have (90, 100, 110 rows)


Fold band in half so the last worked row and beginning ch meet. Join by slst through each st of beginning ch and blo of last row.


Now, switch to G/4.00mm hook and start working on the body of the hat into the sides of the band rows.


Body:

Round 1:    Ch1, sc into each row, join, turn (90, 100, 110 sts)

Round 2:    Ch1, *fpsc around next 5 sts, dc, sc, dc, sc, dc; repeat from * around, join, turn

Round 3:    Ch2, dc in each st around, join, turn

Round 4:    Ch1, *sc, dc, sc, dc, sc, fpsc around next 5 sts; repeat from * around, join, turn

Round 5:    Ch2, dc in each st around, join, turn


Toddler: Repeat rows 2-5 three more times, repeat rounds 2-4 one more time. (20 rounds total)

Child: Repeat rounds 2-5 four more times, repeat round 2 one more time. (22 rounds total)

Adult: Repeat rows 2-5 four more times, repeat rounds 2-4 one more time. (24 rounds total)

If you would like a slouchy hat, repeat until desired length.


Decrease:

Since the Toddler and Adult sizes end on a “Round 4”, and the Child ends on a “Round 2”, the decreasing rounds are different for the Child size. If you choose to add rounds to your hat, use the appropriate decreasing version depending on which round you end on.


Child:          

Round 1:      Ch2, *dc in next 8, dc2tog; repeat from * around, join, turn.

Round 2:      Ch1, *sc, dc, sc, dc, sc, fpsc 2, fpsc2tog; repeat from * around, join, turn.

Round 3:      Ch2, *dc in next 6, dc2tog; repeat from * around, join, turn.

Round 4:      Ch1, *fpdc 2, fpdc2tog, dc, sc, dc; repeat from * around, join, turn.

Round 5:      Ch2, *dc in next 4, dc2tog; repeat from * around, join, turn.

Round 6:      Ch2, *dc in next 3, dc2tog; repeat from * around, join, turn.


Cut yarn leaving a long tail. Weave tail back and forth through remaining sts and pull hole closed. Secure/weave in all ends.

Attach a pompom if you like.          


Toddler/Adult:

Round 1:      Ch2, *dc in next 8, dc2tog; repeat from * around, join, turn.

Round 2:      Ch1, *fpsc 2, fpsc2tog, dc, sc, dc, sc, dc; repeat from * around, join, turn.

Round 3:      Ch2, *dc in next 6, dc2tog; repeat from * around, join, turn.

Round 4:      Ch1, *sc, dc, sc, fpdc 2, fpdc2tog; repeat from * around, join, turn.

Round 5:      Ch2, *dc in next 4, dc2tog; repeat from * around, join, turn.

Round 6:      Ch2, *dc in next 3, dc2tog; repeat from * around, join, turn.


Adult:         

Round 7:      Ch2, *dc in next 2, dc2tog; repeat from * around, join, turn.


Cut yarn leaving a long tail. Weave tail back and forth through remaining sts and pull hole closed. Secure/weave in all ends.

Attach a pompom if you like.          


You’re done 🙂


If you would like to get the downloadable and color coded PDF version of this pattern, you can find it here on Ravelry.

Don’t forget to subscribe so you don’t miss out on the weekly free patterns!

Have a happy crafty weekend,


Emma

He Said – She Said

He Said – She Said

Week 23 of our Year of Hats is here! As you might have guessed from the picture, it is a man’s hat!!! I mean, it can be a lady’s hat, too, or even a couple matching hats. The sizes are specifically adult medium and adult large, and with just two skeins of the beautiful Lichen and Lace Rustic Heather Sport, you can make one of each size!! How awesome is that 🙂

This hat is such a joy to work up! The yarn is stunning, and the fade will keep you engaged. But the stitches and the pattern are so easy, you can totally make this while watching a movie! 

Finally, I was able to make something for the Hubby that he will actually like to wear! And there is enough yarn left to make another hat! 


Enjoy this pattern, and treat yourself or your partner to this beautiful work of art.


PATTERN:


Size:

Adult Medium  (22” head circumference)

Adult Large (24” Head circumference)


Materials:

Yarn: Sport weight yarn.

Sample was made with Lichen and Lace Rustic Heather Sport (100% Wool) in colors

Ash (A) and Birch (B)

Hooks: F/3.75mm & G/4mm

Other: Darning needle to weave in the ends


Abbreviations:

Ch – Chain(s)

Yo – Yarn Over

St(s) – Stitch(es)

Slst – Slip Stitch

Sc – Single Crochet

Scblo – Single Crochet Back Loop Only

Sc2togblo – Single Crochet 2 Stitches Together Through the Back Loops Only


Notes: 

  • The beginning ch never counts as a stitch
  • Always join rounds to the first stitch of the round.


Instructions:


Band:


With 3.75mm hook and color A, ch 8/10

Row 1.         Sc in second and each ch, turn (7/9 sc)

Row 2.         Ch1, sc, scblo 5/7, sc, turn (7/9 sts)


Repeat row 2 until you have 108 rows for medium, 120 rows for large size.


Fold band in half and join last worked row to the unworked loops of the beginning ch by slst each corresponding st together.


Turn band so the seam is facing away from you. Switch to 4mm hook.


Body:

Round 1.      Ch1, sc into next and each side of the band rows. Join to first sc. DO NOT TURN

                   (108/120 sts)

Round 2.      Ch1, scblo into each st around, join.

Repeat round 2 until hat measures 7” (round 26). For a slouchy hat, keep going for 2-3” longer.


Crochet rounds in colors A and B as follows:


Round

Color

1-4

A

5

B

6-8

A

9

B

10-11

A

12

B

13

A

14

B

15

A

16-17

B

18

A

19-21

B

22

A

23-finish

B


Decrease:


Round 1:      Ch1, (scblo 10, scblo2tog) repeat around, join 

Round 2:      Ch1, (scblo 9, scblo2tog) repeat around, join

Round 3:      Ch1, (scblo 8, scblo2tog) repeat around, join

Round 4:      Ch1, (scblo 7, scblo2tog) repeat around, join

Round 5:      Ch1, (scblo 6, scblo2tog) repeat around, join

Round 6:      Ch1, (scblo 5, scblo2tog) repeat around, join

Round 7:      Ch1, (scblo 4, scblo2tog) repeat around, join

Round 8:      Ch1, (scblo 3, scblo2tog) repeat around, join

Round 9:      Ch1, (scblo 2, scblo2tog) repeat around, join

Round 10:    Ch1, (scblo 1, scblo2tog) repeat around, join

Round 11:    Ch1, (scblo2tog) repeat around, join


Cut yarn leaving a long tail. Using a darning needle, weave this tail back and forth through the back loops of the remaining stitches, pull closed. Weave in all ends


You’re done 🙂

If you would like to get the color coded downloadable PDF version of this pattern, you can find it here on Ravelry.


Don’t forget to subscribe so you don’t miss out on the weekly free patterns!

Have a happy crafty weekend,


Emma

Pin It on Pinterest