Select Page
The Twist

The Twist

Happy Monday, Friends!

What do you think about  a crochet swirl? I am loving the look lately, and after making the Wanderlust hat, I thought, hey, why not make a swirl hat?! Hence, may I introduce to you: The Twist!


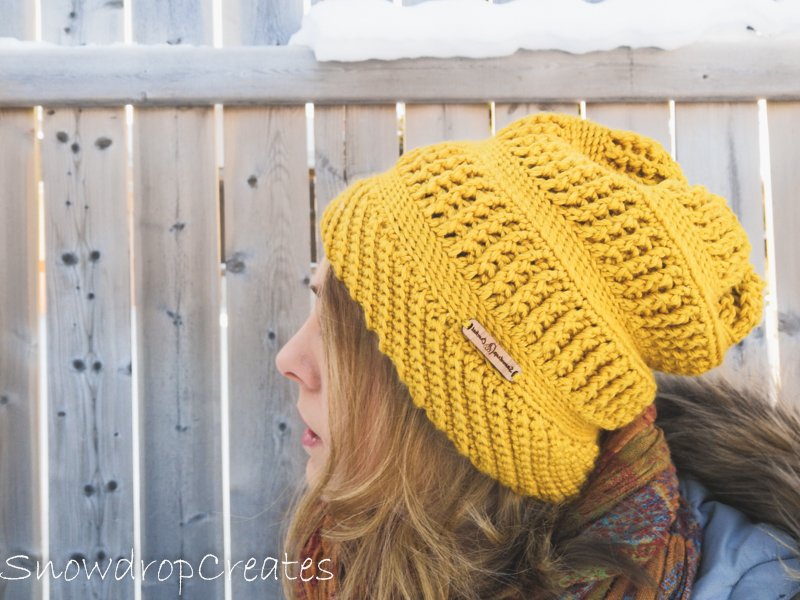
Can we talk about this yarn for a minute? This was the first time using the Knitpicks Paragon yarn, and I am in LOVE with it! It is SO soft, SO shiny, and SO beautiful. An absolute joy to work with! I think this just might just be my new favorite yarn by KnitPicks! In my mind, there is already a shirt, a sweater, another hat, and some socks made with it… now, to find the time to actually make all of that AND write up the patterns… sheesh!

But, you don’t want to read about my mind, that never shuts off and won’t let me sleep, so…

Here we go:

*As always, have fun with this pattern and please read all the notes before starting to crochet*


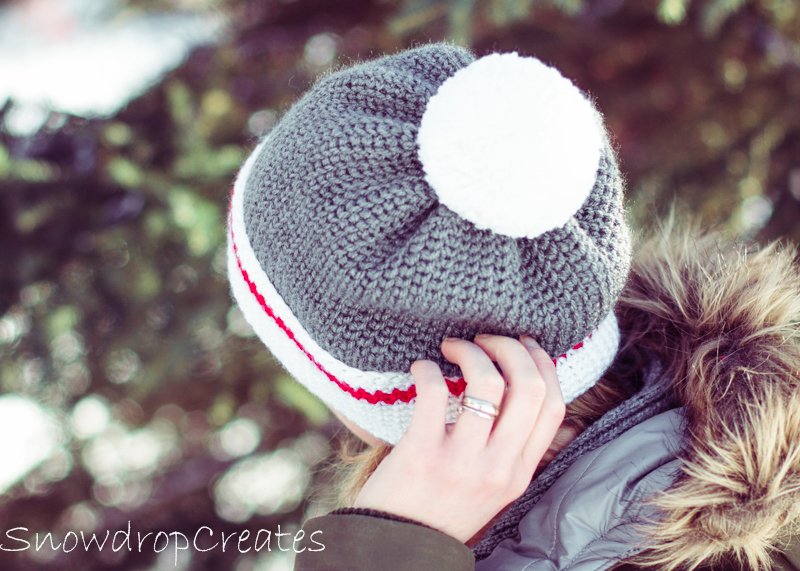
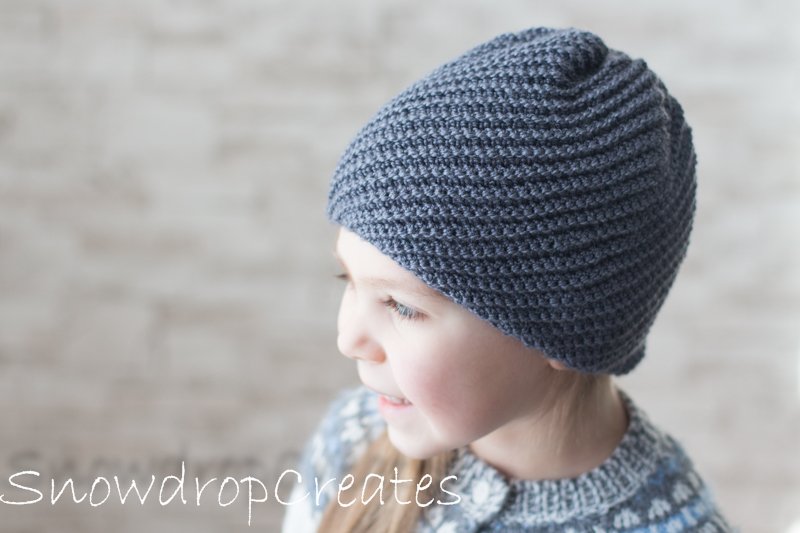
To Fit Sizes:                                               Finished Size*:

Toddler (18-19” head circumference)

Child (20-21” head circumference)

Adult (22-23” head circumference)

16” circumference / 6” height

18” circumference / 6.5” height

20”circumference / 7” height


*The fabric of this hat will be VERY stretchy, therefore, it is designed with at least 2” negative ease in the width, and 1” in the height. It will have a nice snug fit. If you would like a longer hat, just add stitches to the beginning chain.


Materials:

Yarn: Sport weight; Sample was made with KnitPicks Paragon Yarn (50% Fine Merino, 25% Baby Alpaca, 25% Mulberry Silk) (123 yards/50g)  in color “Ash” (2 skeins for all sizes)

Hooks: D/3.25mm, 7/4.5mm


Gauge: 10 sts/6.5-7 rows in 2” of body, unstretched.

Abbreviations:

Ch – Chain

St(s) – Stitch(es)

Sc – Single Crochet

BLO – Back Loop Only

Sc2tog – Single Crochet two Stitches Together (Decrease)

Inc – Put two Single Crochet into one Stitch (Increase)

Pm – Place Marker

RS – Right side of fabric


Notes:

  • The entire hat is worked into BLO! Except:
  • When working the decrease (sc2tog) at the beginning of a row, put your hook into both loops of the first stitch, and then into the BLO of the second stitch. In the same way, when coming back to the decrease, put hook into BLO of second to last, and through both loops of the last stitch. Doing this will give you a neat edge around the band.
  • The section that is worked with the smaller hook (the “decrease” end of the hat) is the band of the hat. It is crocheted tighter so that it doesn’t stretch out as quick and has a better fit.
  • Put a stitch marker into the last stitch that is worked with the smaller (3.25mm) hook (picture 1)
  • Coming back towards the band, switch back to smaller hook one stitch before the stitch marker; this is to keep the stitch count in the band correctly (picture 2)

Instructions:


NOTE: The entire hat is worked into BLO!


With larger hook (4.5mm), chain 51, 58, 65


Round 1. With smaller (3.25mm) hook, sc2tog over 2nd and 3rd chain from hook, sc in next (4, 5, 6) chains (pm), switch to larger hook, sc in next (43, 49, 55) chains, inc. in last ch, turn (50, 57, 64 sts)

Round 2. (RS) Ch1, inc in first st, sc in next (43, 49, 55) sts, switch to smaller hook, sc in next (4, 5, 6) sts, sc2tog, turn (50, 57, 64 sts

Round 3. Ch1, sc2tog, sc in next (4, 5, 6) sts (pm), switch to larger hook, sc in next (43, 49, 55)sts, inc, turn (50, 57, 64 sts)


Repeat rows 2 & 3 in this way until the band measures about (18”, 20”, 22”) when stretched (or 16”, 18”, 20”, unstretched). This will be approximately (60, 68, 76) rows.


Finishing:


Fold your work in half so the angled edges meet. Slst together the unworked loops of the starting chain and the back loop of your last worked row. Do this on the right side of the hat, so the seam is less visible.

Cut yarn, leaving a very long tail. Thread tail into a darning needle and weave through the last stitch of each row that is facing you (at the top of the hat):

Pull very tight and secure/weave in ends on the inside. Weave in all other ends.


Youre done 🙂 


If you would like to get the downloadable and color coded PDF version of this pattern, you can find it here on Ravelry.

I hope you have lots of fun with this pattern, and share with me on Social Media! Use hashtags #snowdropthetwist #snowdropcrochet #thetwisthat

Don’t forget to subscribe! There is a new free hat pattern released every Monday! 


Have a happy, crafty week and until next week!

Emma

The Sock Monkey Hat

The Sock Monkey Hat

Happy Monday, Friends!

This week, we are jumping on the Sock Monkey wagon, with this cool hat. Can you believe this is a crochet hat?! Believe it! This epic stitch looks like it is knit, so the hookers among us can still get a “knit” hat, without having to use the sticks. 


The stitch we are using is called the Waistcoat Single Crochet, and while it can be tricky at first, it is not at all hard to do! So, I would still consider this hat to be an (advanced) beginner pattern.

There are a few things to keep in mind with this stitch. If you have never made it, a swatch is highly recommended. This is so you know if you have to adjust the hook size to get the gauge. It is the “advanced” part of this project.


What is a swatch, you ask?

A swatch is a sample piece of, say 20 stitches, where you crochet up the pattern for a few rows to practice and be able to measure your gauge before you commence to make the actual item. This sounds like a tedious waste of time, but it is much quicker than having to open up your work after hours of working on it, just because it does not fit right! (That, in my opinion, is the biggest drag of them all!)


Everyone’s gauge is different, but especially with this stitch, I have found, the variations can be significant. Therefore, make a swatch with the recommended hook size, and then adjust and swatch again.


An example:

  • A swatch with the 8mm hook results in 8sts in 2”. You will have to go one hook size down and try again, until you get close to the 6sts in 2” that this hat was designed for.
  • OR a swatch with the 8mm hook results in 4 sts in 2”. Try again with one size up until you get closer to the right gauge.

Easy enough, right?! And TOTALLY worth the end result, believe me!


On another note, it was so freaking cold when we took these pictures, that I could barely breathe and my eyes were watering. So there you see how much I like all of you to go through all that trouble to be able to share this pattern with you! You’re welcome. 😛 


So, here goes the pattern! Enjoy! 

Sizes:

Toddler (18-19” head circumference)

Child (20-21” head circumference)

Adult (22-23” head circumference)


Gauge:   9rows/6sts in 2” (measured in body of hat)


Materials:

Yarn: Worsted weight yarn, Sample was made using KnitPicks Brava Worsted in colors White, Red, Cobblestone Heather (1 ball of grey plus a about 20 g white and a little red)

Hooks: 7mm , 8mm hooks

Other: Large fur or yarn pompom (3”-4”)


Abbreviations:

Ch – Chain

St – Stitch

Slst – Slip Stitch

Wcsc – Waistcoat Single Crochet

Wcsc2tog – Waistcoat Single Crochet 2 together


Special Stitch WCSC:

This stitch is a single crochet, except that it is worked into the post of the stitch below, rather than between stitches:


Placement for regular SC

Placement for WCSC

Make sure to go toward the left of that “third leg” on the back!

WCSC2Tog:

Work just like a normal sc2tog except, again into the post of the stitch below.


Notes:

  • Work the WCSC loosely.
  • Pull the joining slst VERY tight, that way the seam becomes almost invisible. (To do that, work your join, then pull on your yarn until it is nice and tight, then continue with the next round.)
  • After joining, place first stitch into the same sc (wcsc) as the join.
  • Gauge is very important for this pattern. Because this stitch has to be worked loosely, it is important that you adjust the hook to get the right measurements, or adjust the stitch count. (Everyone’s “loose” stitches might look different.)
  • Band width will be about 2”, 5”, 3” once folded. Total length of hat (with band folded over) will be about 7”, 7.5”, 8”. The weight of a pompom will give this hat a slouchy look, but it is easy to adjust for more slouch by simply adding rows to the body before decreasing.

Instructions: 

Band:

With 7mm hook and white yarn, ch 56, 63, 70, join to first ch to make a circle, being careful not to twist the chain.

  1. Ch1, sc in each ch around, join to first sc (pull join tight) (56, 63, 70 sts)
  2. Ch1, wcsc into each st around, join to first sc (change color to red)
  3. – 4. Rep row 2 (at the end of row 4, change color back to white)

Repeat row 2 (5, 7, 9) times, switch to grey yarn and 8mm hook.

Turn your work so you are working on the wrong side of the band. You will be working in the opposite direction of the band from now on. That way, both the band and the body of the hat will be right side facing after folding the band over.


Body:

Switch to 8mm hook.

  1. ch1, sc into each st around, join (56, 63, 70 sts)
  2. ch1, wcsc into each st around, join

Repeat row 2 until hat from color change measures 6”, 6.5”, 7” (27, 29, 31 rows), or to desired length.


Decrease:

  1. ch1, (wcsc in next 5sts, wcsc2tog) repeat around, join (48, 54, 60)
  2. ch1, (wcsc in next 4sts, wcsc2tog) repeat around, join (40, 45, 50)
  3. ch1, (wcsc in next 3sts, wcsc2tog) repeat around, join (32, 36, 40)
  4. ch1, (wcsc in next 2 sts, wcsc2tog) repeat around, join (24, 27, 30)
  5. ch1, (wcsc in next sts, wcsc2tog) repeat around, join (16, 18, 20)


Cut yarn, leaving a long tail. Weave yarn back and forth through the remaining sts and pull tight to close the hole. Secure the yarn on the inside of the hat and weave in your ends. Attach a pompom if you like.


Optionally, the band can be sewn on to the hat to make sure the grey isn’t showing on the bottom.


You’re done 🙂


If you would like to get the downloadable and color coded PDF version of this pattern, you can find it here on Ravelry.

I hope you have lots of fun with this pattern, and share with me on Social Media! Use hashtags #snowdropsockmonkey #snowdropcrochet #sockmonkeyhat

Don’t forget to subscribe! There is a new free hat pattern released every Monday! 


Have a happy, crafty week and until next week!

Emma

The Wanderlust Hat

The Wanderlust Hat

It is Monday you guys!!! I could hardly wait to show you the Wanderlust hat. It is a truly amazing design (if I might say so myself) with stunning texture and perfect fit! With just the right amount of slouch, this hat will turn eyes wherever you go. 🙂

When I saw the Rudbekia hat by Drea Renee Knits, I just fell in love with the texture and wanted to create something similar for the crocheters of the world. So that beautiful knit pattern was the inspiration for the Wanderlust. Hopefully, you love it as much as I do! 


The pattern is made for DK weight yarn. Use wool for warmth and durability, and this beautiful accessory will serve you well for years to come! One of my favourite features is that it uses decrease rows on the top rather than being gathered, which means it does not require a pompom to “hide” that gather. (Of course, you are still welcome to add one!)


A few notes before we go to the pattern:

  • Please make sure you have the right gauge or measure the band on your hat before going on to the body of the hat. This is VERY important. The band should fit with a bit of ease, not too tightly. The stitch count does not matter in this design so much, except you might have to make some alterations in the decrease rows. This is not very hard to do though and well worth it to get a hat that fits properly.
  • Crochet the slst VERY loosely, otherwise those rows will be too tight later. 

Here goes:

Sizes:

Toddler (18-19” head circumference)

Child (20-21” head circumference)

Adult (22-23” head circumference)


Gauge: 9sts & 5 rows/2” of fpdc/bpdc section


Materials:

Yarn: DK weight yarn. Sample was made in Knitpicks Gloss DK (70% Merino wool, 30% Silk; 123yrds/50g)  2 (2, 3) skeins

Hooks: G/4.5mm  & J/6mm crochet hooks

Other: Stitch marker


Abbreviations:

Ch – Chain

St(s) – Stitch(es)

Sc – Single Crochet

Dc2tog – Double Crochet two Stitches Together

Dc – Double Crochet

Slst – Slip Stitch

Blo – Back Loop Only

Slst2tog in BLO – Slip Stitch 2 Together in Back Loops

Inc – Increase


Slst2tog in blo: put hook into the back loop of next 2 stitches, yarn over, pull through all loops on hook. (If you have another way of doing it, go for it. This is what I do)


Increase: Work two sc in the same stitch/chain.


Notes:

  • Please read instructions and notes carefully
  • When doing slst, remember to do so loosely, it is easy to make them too tight
  • The band is worked in the back loops only
  • The body of the hat consists of 2 sections that are repeated 3 times each. The slst section is entirely worked in the back loops 

Instructions:


Toddler:


Using smaller (G/4.5mm) hook, leave a long tail about 7”. Ch 9

Row 1. sc 2 in 2nd chain, sc in next 5 chains, sc last 2 chains together, turn (8 sc)

Row 2. ch1, sc2tog in BLO, sc in BLO in next 5 sts, inc in BLO, turn

Row 3. ch1, inc in BLO, sc in BLO in next 5 sts, sc2tog in BLO, turn


Continue rows 2-3 until you have 60 rows or your band measures about 16”.

Slst into the top of the first row to create a loop. DO NOT FASTEN OFF. You will be working on the outside of the hat in the round and use the tail to sew the band together later.

Body:

Change to J/6mm hook and work into the side on the band (picture demonstrates where to put stitches):

Round 1. Ch1, (sc in next 4, 2sc inc in next) repeat around, join (72)

Round 2.  Ch1, slst in BLO in each stitch around. Work your slst loosely! Do not join, instead pleace a stitch marker in the first stitch and work in the round.

Rounds 3. -5. slst in BLO in each st around. At the end of round 5, join into first stitch.

Round 6. ch2, dc in each st in BLO around, join

Round 7. ch2, (bpdc around first st, fpdc in next st) repeat around, join

Round 8. ch2, (bpdc, fpdc)  around, join

Round 9. ch1, sc in each st around, join

Rounds 10.-14. Repeat rows 2-5


Repeat rounds  6-14 one more time. Repeat rounds 6-8 one more time. You should now have three slst sections and three dc sections.


Decrease:


Round 1. ch1, (sc in next 4 sts, sc2tog) 12 times around, do not join. Place stitch marker. (60)

Round 2. (slst in BLO in next 3, slst2tog in BLO) around (48)

Round 3. (slst in BLO in next 2, slst2tog in BLO) around (36)

Round 4. (slst in BLO in next, slst2tog in BLO) around(24)

Round 5. (slst2tog in BLO) around (12)


Slst2tog in BLO around until the hole is almost closed. Cut yarn, weave through remaining stitches and pull hole closed. Weave in/secure tail.


Use the long tail you left in the beginning to sew the band closed on the inside of the hat and weave in/secure yarn.


 Child:


Using smaller (G/4.5mm) hook, leave a long tail about 7”. Ch 11

Row 1. sc 2 in 2nd chain, sc in next 7 chains, sc last 2 chains together, turn (10)

Row 2. ch1, sc2tog in BLO, sc in BLO in next 7 sts, inc in BLO, turn

Row 3. ch1, inc in BLO, sc in BLO in next 7 sts, sc2tog in BLO, turn


Continue rows 2-3 until you have 68 rows or your band measures about 18”.  


Slst into the top of the first row to create a loop. DO NOY FASTEN OFF. You will be working on the outside of the hat in the round and use the tail to sew the band together later. (See picture in the Toddler instructions)


Body:


Change to J/6mm hook, working into the side on the band (See picture in the Toddler instructions):


Round 1. Ch1, (sc in next 4, 2sc inc in next) repeat 13 times, sc in last 3 sts, join (81)

Round 2.  Ch1, slst in BLO in each stitch around. Work your slst loosely! Do not join, instead pleace a stitch marker in the first stitch and work in the round.

Rounds 3. -6. slst in BLO in each st around. At the end of round 6, join into first stitch.

Round 7. ch2, dc in each st in blo around, join

Round 8. ch2, (bpdc around first st, fpdc in next st) repeat around, join

Round 9. ch2, (bpdc, fpdc)  around, join

Round 10. repeat 9

Round 11. ch1, sc in each st around, join

Rounds 12.-16. Repeat rows 2-6


Repeat rounds 7-16 one more time. Repeat rounds 7-10 one more time. You should now have three slst sections and three dc sections.


Decrease:


Round 1. ch1, (sc in next 4 sts, sc2tog) 13 times, sc in last 3 sts, do not join. Place stitch marker. (68)

Round 2. (slst in BLO in next 3, slst2tog in BLO) around, slst in BLO in last 3 sts (55)

Round 3. (slst in BLO in next 2, slst2tog in BLO) around, slst in BLO in last 3 sts (42)

Round 4. (slst in BLO in next, slst2tog in BLO) around, slst in BLO in last 3 sts (29)

Round 5. (slst2tog in BLO) around (16)


Slst2tog in BLO around until the hole is almost closed. Cut yarn, weave through remaining stitches and pull hole closed. Weave in/secure tail.


Use the long tail you left in the beginning to sew the band closed on the inside of the hat and weave in/secure yarn.


Adult:


Using smaller (G/4.5mm) hook, leave a long tail about 7” Ch 13

Row 1. sc 2 in 2nd chain, sc in next 9 chains, sc last 2 chains together, turn (12)

Row 2. ch1, sc2tog in BLO, sc in BLO in next 9 sts, inc in BLO, turn

Row 3. ch1, inc in BLO, sc in BLO in next 9 sts, sc2tog in BLO, turn


Continue rows 2-3 until you have 75 rows or your band measures about 20”


Slst into the top of the first row to create a loop. You will be working on the outside of the hat in the round and use the tail to sew the band together later. (See picture in the Toddler instructions)


Body:


Change to J/6mm hook, working into the side on the band (See picture in the Toddler instructions):


Round 1. Ch1, (sc in next 4, 2sc inc in next) repeat 15 times,join (90)

Round 2.  Ch1, slst in BLO in each stitch around. Work your slst loosely! Do not join, instead pleace a stitch marker in the first stitch and work in the round.

Rounds 3. -6. Slst in BLO in each st around. At the end of round 6, join into first stitch.

Round 7. ch2, dc in each st in BLO around, join

Round 8. ch2, (bpdc around first st, fpdc in next st) repeat around, join

Round 9. ch2, (bpdc, fpdc)  around, join

Round 10. repeat 9

Round 11. ch1, sc in each st around, join

Rounds 12.-16. Repeat rows 2-6

Repeat rounds 7-16 one more time. Repeat rounds 7-10 one more time. You should now have three slst sections and three dc sections.


Decrease:


Round 1. ch1, (sc in next 4 sts, sc2tog) around, do not join. Place stitch marker. (75)

Round 2. (slst in BLO in next 3, slst2tog in BLO) around (60)

Round 3. (slst in BLO in next 2, slst2tog in BLO) around (45)

Round 4. (slst in BLO in next, slst2tog in BLO) around (30)

Round 5. (slst2tog in BLO) around (15)


Slst2tog in BLO around until the hole is almost closed. Cut yarn, weave through remaining stitches and pull hole closed. Weave in/secure tail.


Use the long tail you left in the beginning to sew the band closed on the inside of the hat and weave in/secure yarn.


You’re done 🙂


If you would like to get the PDF version of this pattern, you can find it here on Ravelry. 

I hope you have lots of fun with this pattern, and share with me on Social Media! Use hashtags #snowdropwanderlust #snowdropcrochet #wanderlusthat

Don’t forget to subscribe! There is a new free hat pattern released every Monday! 


Have a happy, crafty week and until next week!

Emma

The Callie Cable Hat

The Callie Cable Hat

Hello Friends!

This is a quick post today. I would like to just share the Callie Cable hat with you. A beautiful spring/summer hat with an interesting cable motif on the side. 


 Only a couple of notes before you get started:

  •  Please read the notes for the pattern carefully. Each round is ended by a join, and each new round started in that first stitch. This is important to keep the cable nice and straight. 
  • Please make sure you have the right gauge. As you probably know, not all sport weight yarn is the same. It is important to adjust your hook to the yarn you are using so the hat turns out the right size. 


And with that, here goes:


Sizes:

Toddler (18-19” head circumference)

Child (20-21” head circumference)

Adult (22-23” head circumference)


Notes:

  • The chain at the beginning does not count as a stitch
  • Join to the first stitch after every round and put your first stitch into the same stitch as the join


Materials:

  • #2/Sport weight yarn. Sample was made with Schachenmayr Catania (125m/50g) (1, 1, 2 skeins)
  • F/3.75mm


Gauge: 10dc/6rows in 2”


Abbreviations:

Ch – Chain

St(s) – Stitch(es)

Dc – Double Crochet

Tr – Trebble

Slst – Slip Stitch

Fpdc – Front Post Double Crochet

MR – Magic Ring


Cable Motif:

This is the stitch sequence for each round in the cable motif. It is worked over 19 sts. Work round according to instructions, then work this sequence when instructions read “CABLE” then keep working on the round according to the instructions for each size.


Cable Pattern:

1Fpdc in next st, 1dc in next st, skip next 3 sts, 1tr into each of next 3 sts, then going behind the 3tr made, work 1tr into each st that was skipped. 1dc into next st, 1fpdc into next st, 1dc into next st. Skip next 3 sts, put 1tr into each of next 3 sts, then going in front of 3tr made, work 1tr into the skipped three stitches. CAREFULL, not to catch the trebbles made.*  1dc in next st, 1fpdc in next st.


*To be able to work in front of the trebbles, you will have to put in your hook as usual, then bring it forward in front of your trebbles, keeping the yarn in front of your work for this step, finish stitch as usual. The pictures show the hook and yarn in front of the work. It’s a bit tricky, but possible J

Instructions:


Toddler:


Make a MR.


  1. ch2, 12dc into MR, join to first dc (12)
  2. ch2, 2dc into each dc, join (24)
  3. ch2, (dc in next st, 2dc in next st) around, join (36)
  4. ch2, (dc in next 2 sts, 2 dc in next st) around, join (48)
  5. ch2, (dc in next 3 sts, 2 dc in next st) around, join (60)
  6. ch2, (dc in next 4 sts, 2 dc in next st) around, join (72)
  7. ch2, (dc in next 5 sts, 2 dc in next st) around, join (84)
  8. ch2, dc in next 17 sts, CABLE, dc in next 48 sts, join


Repeat round 8 ten times or until the desired length of the hat is reached.


Child:


Make a MR.


  1. ch2, 12dc into MR, join to first dc (12)
  2. ch2, 2dc into each dc, join (24)
  3. ch2, (dc in next st, 2dc in next st) around, join (36)
  4. ch2, (dc in next 2 sts, 2 dc in next st) around, join (48)
  5. ch2, (dc in next 3 sts, 2 dc in next st) around, join (60)
  6. ch2, (dc in next 4 sts, 2 dc in next st) around, join (72)
  7. ch2, (dc in next 5 sts, 2 dc in next st) around, join (84)
  8. ch2, (dc in next 6 sts, 2 dc in next st) around, join (96)
  9. ch2, dc in next 20 sts, CABLE, dc in next 57 sts, join


Repeat round 9 eleven times or until the desired length of the hat is reached.


Adult:


Make a MR.


  1. ch2, 12dc into MR, join to first dc (12)
  2. ch2, 2dc into each dc, join (24)
  3. ch2, (dc in next st, 2dc in next st) around, join (36)
  4. ch2, (dc in next 2 sts, 2 dc in next st) around, join (48)
  5. ch2, (dc in next 3 sts, 2 dc in next st) around, join (60)
  6. ch2, (dc in next 4 sts, 2 dc in next st) around, join (72)
  7. ch2, (dc in next 5 sts, 2 dc in next st) around, join (84)
  8. ch2, (dc in next 6 sts, 2 dc in next st) around, join (96)
  9. ch2, (dc in next 7 sts, 2 dc in next st) around, join (108)
  10. ch2, dc in next 23 sts, CABLE, dc in next 66 sts, join


Repeat row 10 twelve times or until the desired length of the hat is reached.


Finishing for all sizes:


Slst in each st around LOOSELY, join.

Cut yarn and weave in all the ends. 


You’re done 🙂


If you would like to get the PDF version of this pattern, you can find it here on Ravelry.

I hope you have lots of fun with this pattern, and share with me on Social Media! Use hashtags #snowdropcallie #snowdropcrochet #calliecablehat

Don’t forget to subscribe! There is a new free hat pattern released every Monday! 


Have a happy, crafty week and until next week!

Emma

Pin It on Pinterest