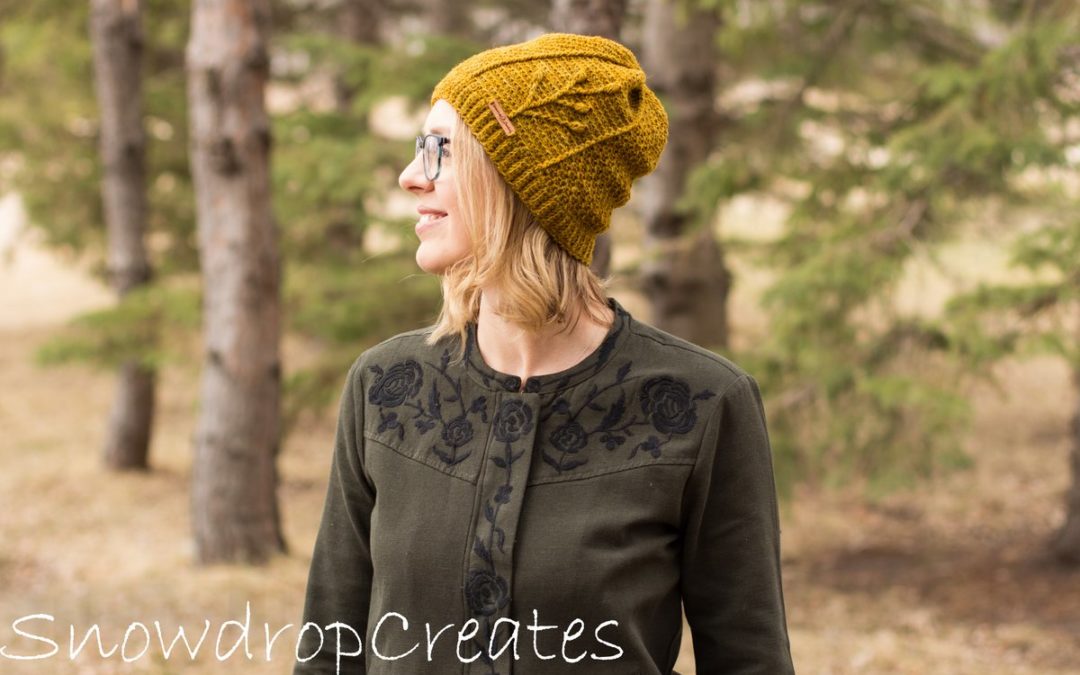
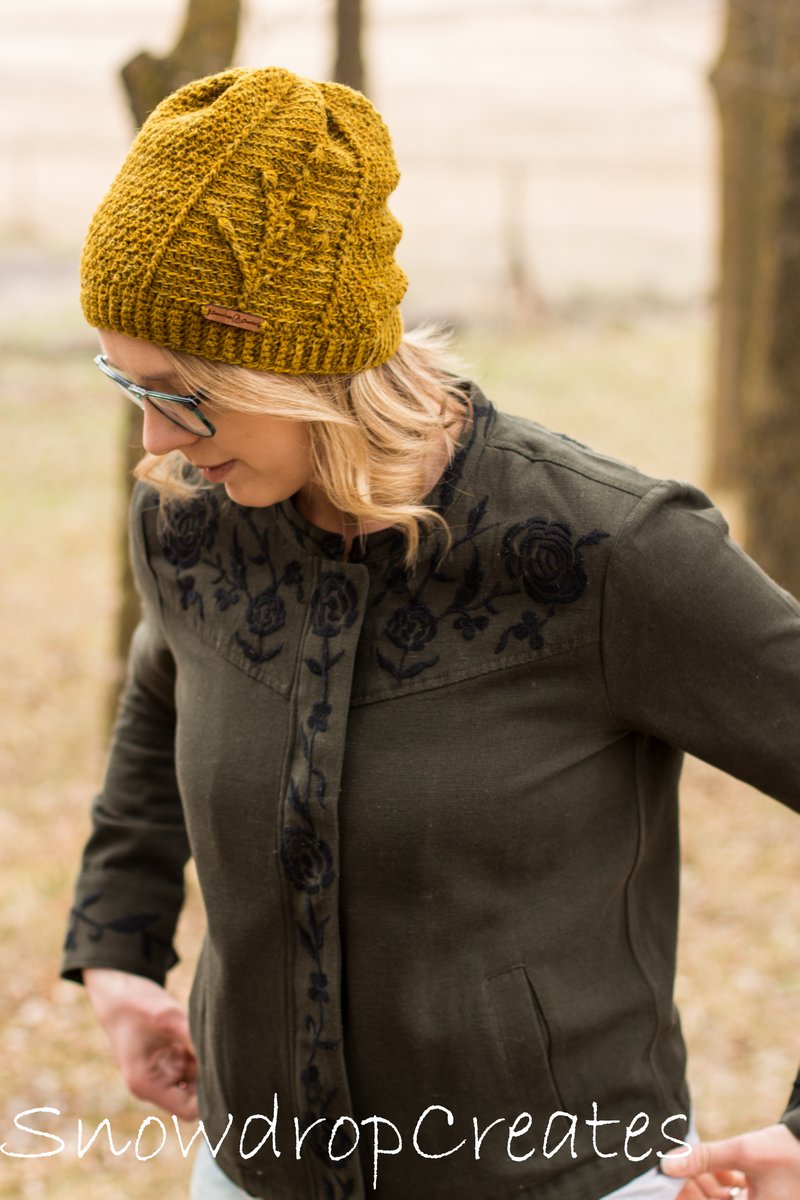
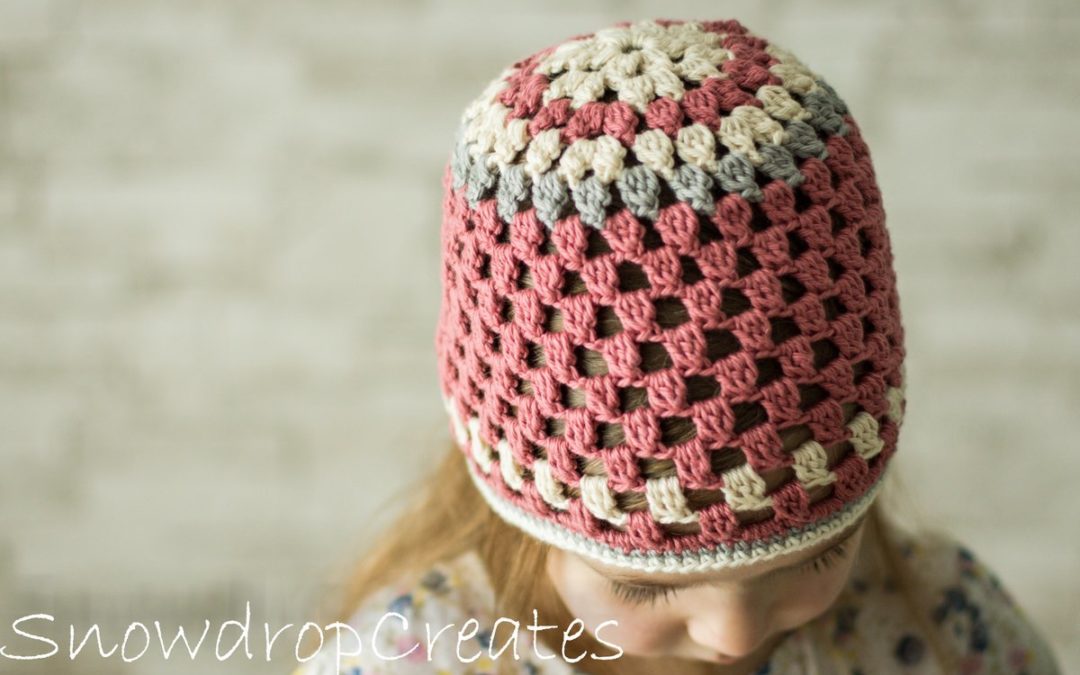
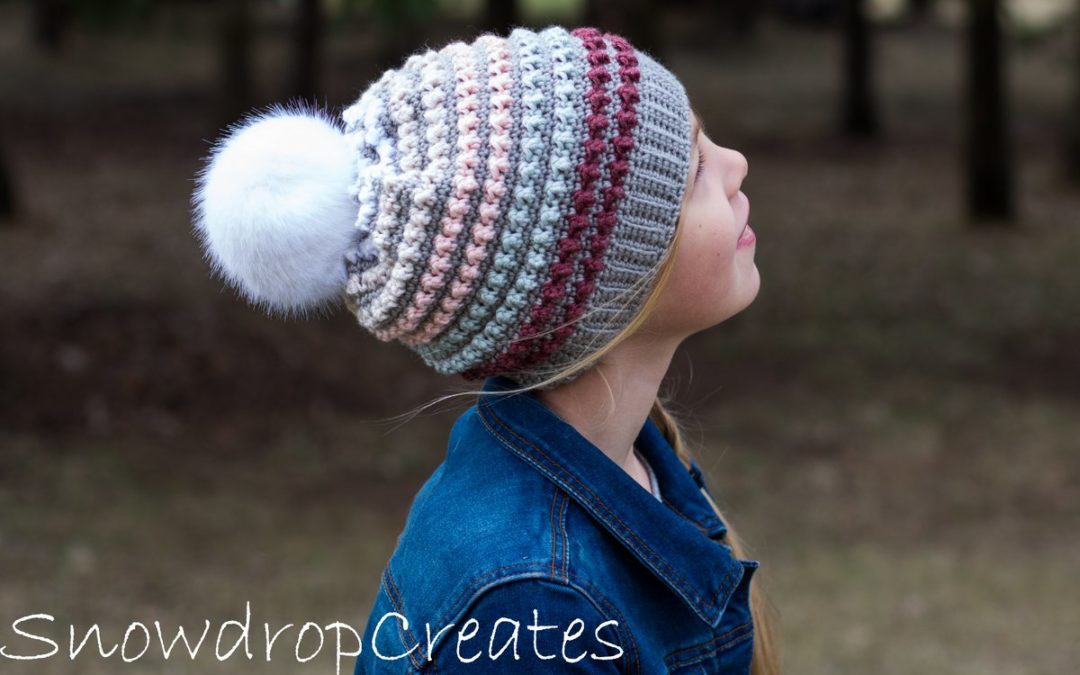
Select Page
Pearlescent

Pearlescent

If you have been following my little here blog for a few months, you might have noticed that I don’t usually use yarn from the store. There are a few reasons for this:

A) We live far away from any stores that sell yarn;

B) I am trying to support small businesses and local yarn stores/dyers etc;

C) Any yarn bought at the stores (mostly Bernat) really did not impress me at all;

D) If I need affordable but beautiful yarn, Knit Picks is my go to.


Being that we are visiting family, however, and my yarn stash could not travel with me, I visited Michaels for the first time in a long time and found this Caron X Pantone Bamboo yarn on sale. The colors are really pretty and it felt so soft, that it was allowed to come home with me and be made into a hat. 

So, let’s talk about this yarn a minute, shall we?

Here is what I loved about it:

– It is really soft, much softer than any other yarn I have tried from Michaels so far;

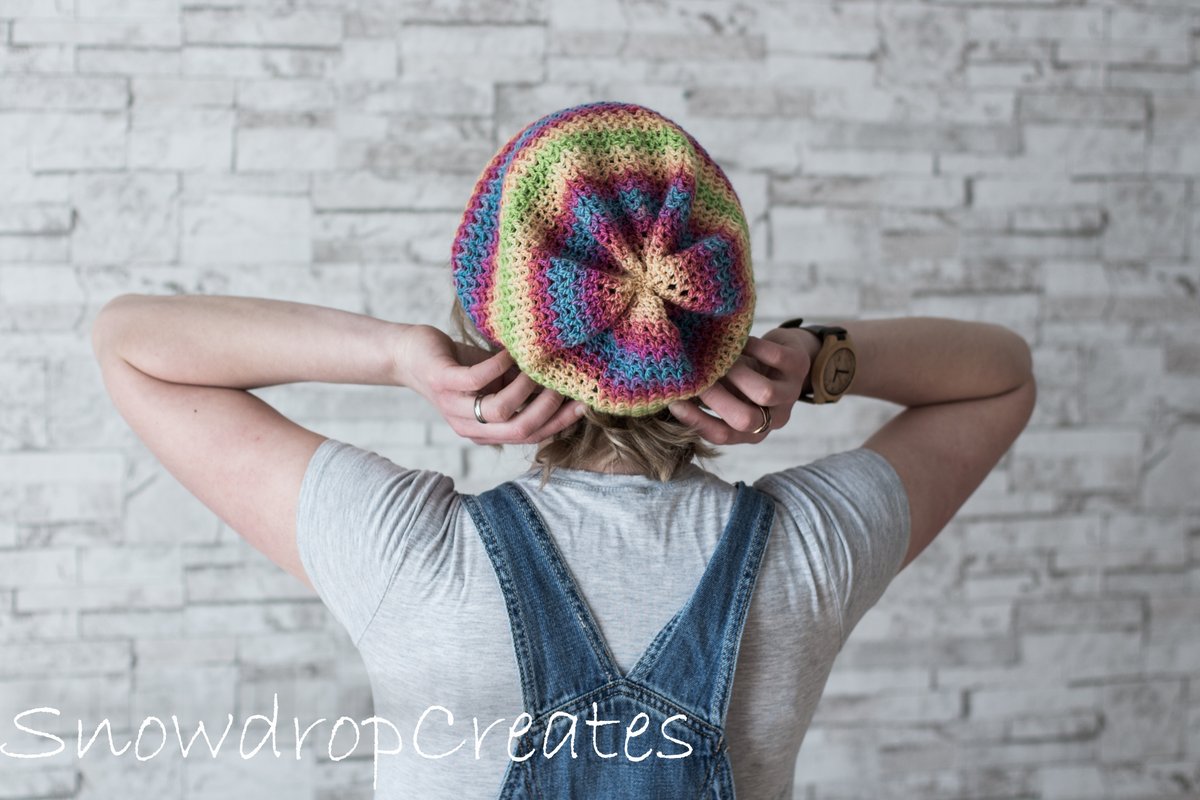
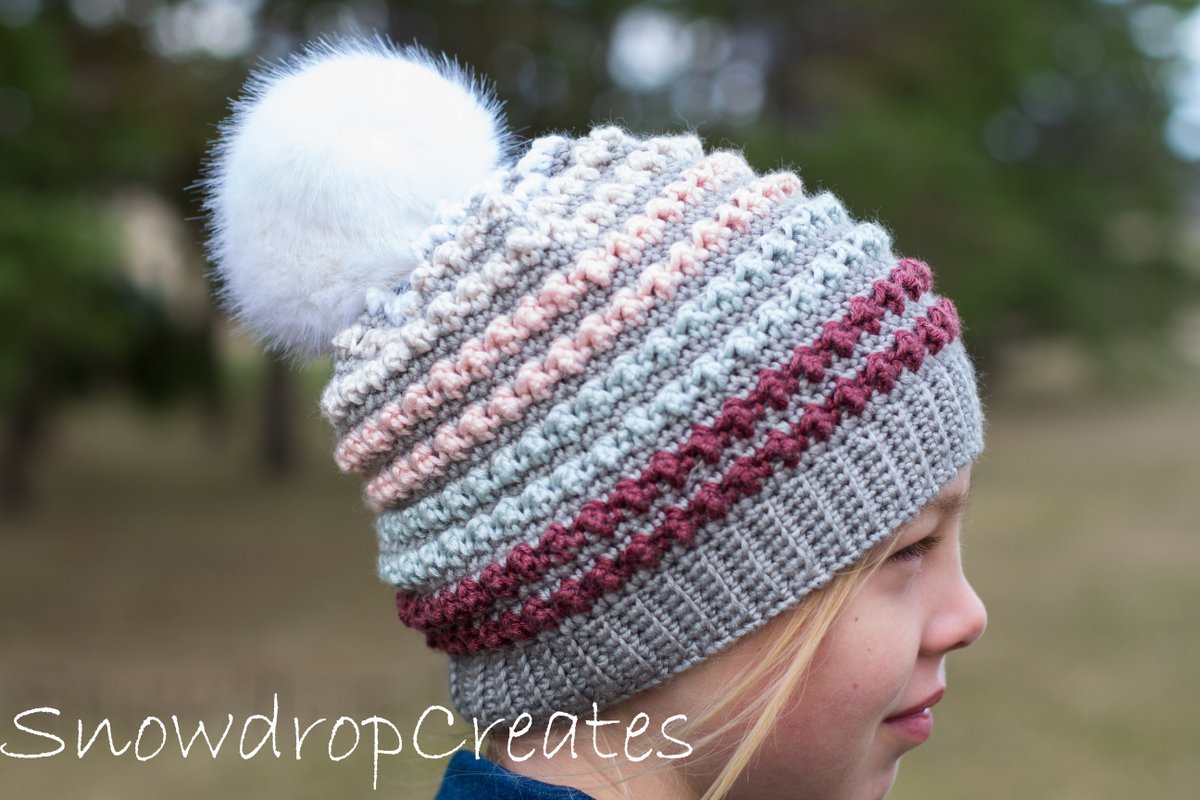
– It has a beautiful sheen and the colors are gorgeous! It is also perfect for color work, as the mixed colored skeins come with five coordinating colors, so you don’t have to figure that out and can save time. 

– Since the mixed skeins come with five 20g mini skeins, you don’t have to buy five full balls of yarn to make the Pearlescent hat. 

Here are the downsides:

– The yarn is not well twisted and splits a lot, which slowed me down considerably and became very frustrating;

– Because it is so soft, knots come apart right away, which means you need to weave in a longer tail to make sure it stays put.


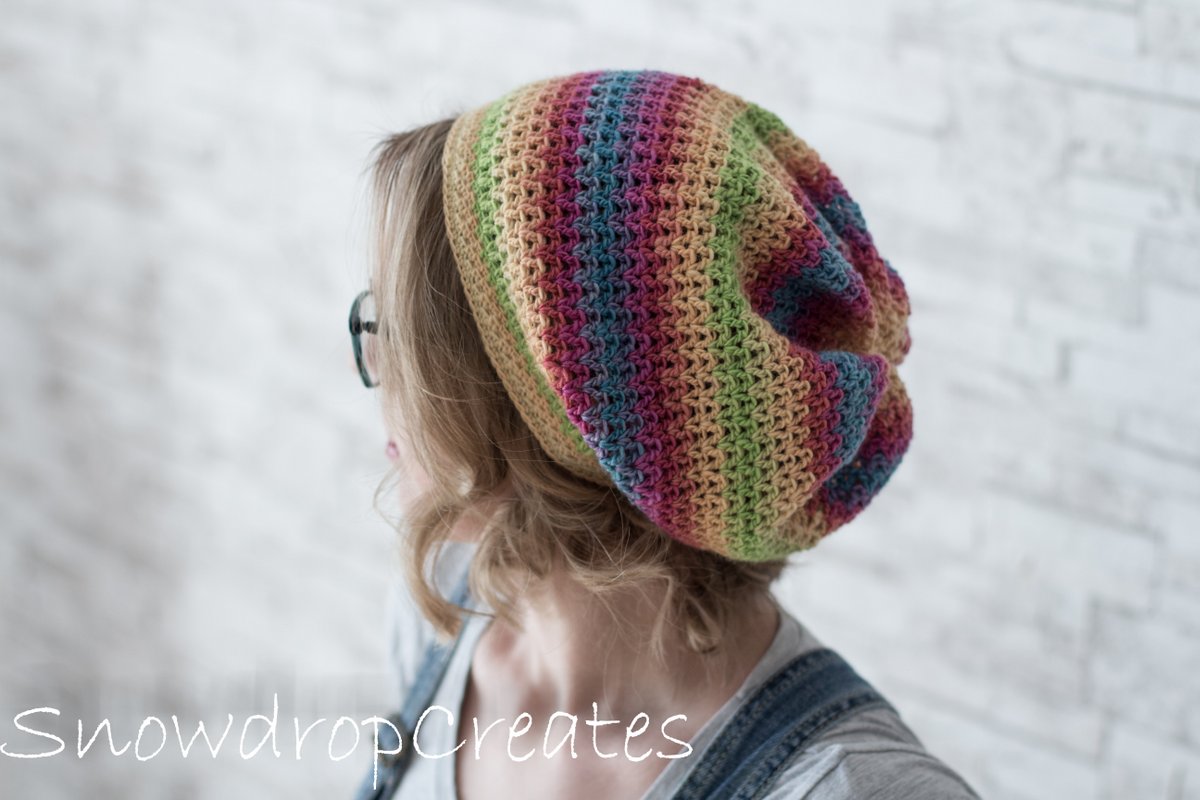
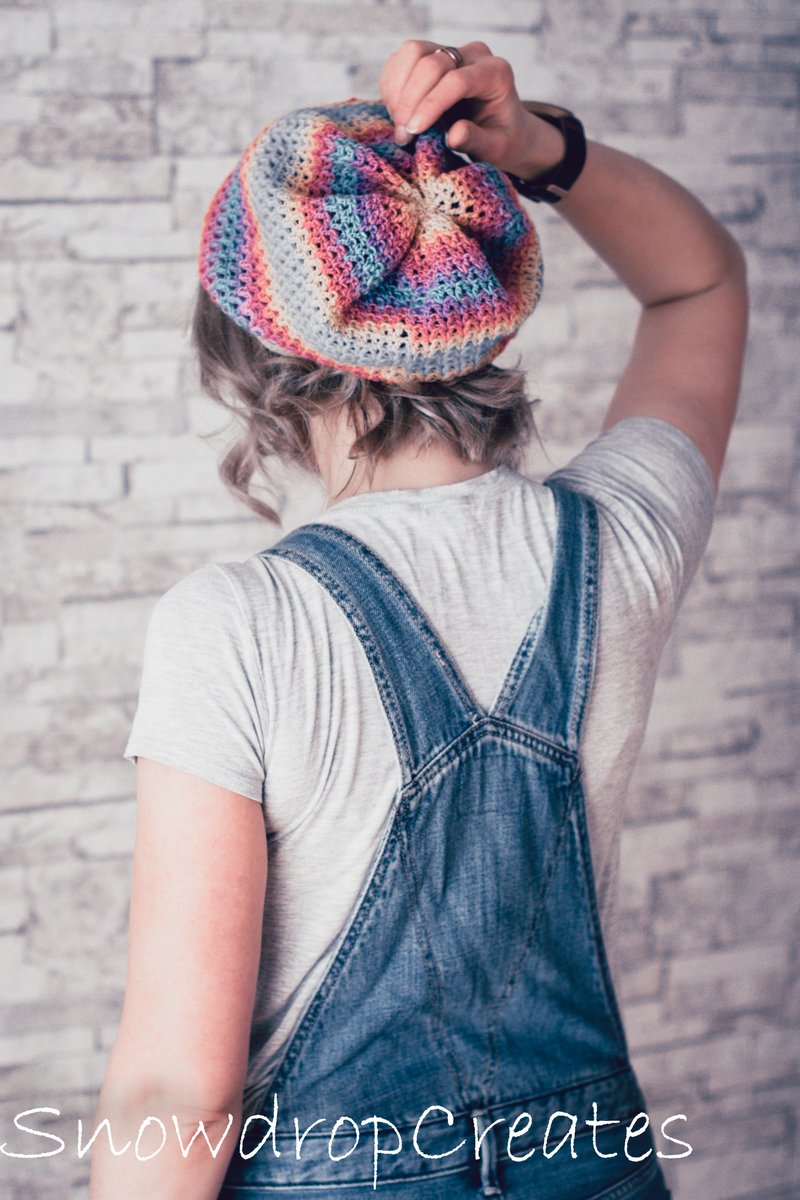
All in all, I am very happy with the finished result and have enough yarn left to make another Toddler sized hat probably (Pictured hat is Child size).

Have fun and let me know what you think!


PATTERN


Size:

Toddler (18-19” head circumference)

Child (20-22” head circumference)

Adult (22-23” head circumference)


Gauge: 8sc/9 rows (in pattern) in 2”

Materials:

Yarn: Worsted weight yarn.

Sample was made in Caron x Pantone Bamboo Yarn (60% Acrylic, 20% Nylon, 20% Viscose from Bamboo)(180 yards/100grams) in Colors:

Ghost Gray (1skein) (MC)

Little Bud (1skein)(Colors A-E)

Hooks: 7/4.5mm & H/5mm

Other: Darning needle to weave in the ends


Abbreviations:

Ch – Chain(s)

Yo –Yarn Over

St(s) – Stitch(es)

Sc – Single Crochet

Tr – Trebble

Scblo – Single Crochet in Back Loops Only

Ws – Wrong Side

Rs – Right Side

Mc – Main Color

Sc2tog – Single Crochet 2 Together

Dec – Decrease in Pattern (see below)


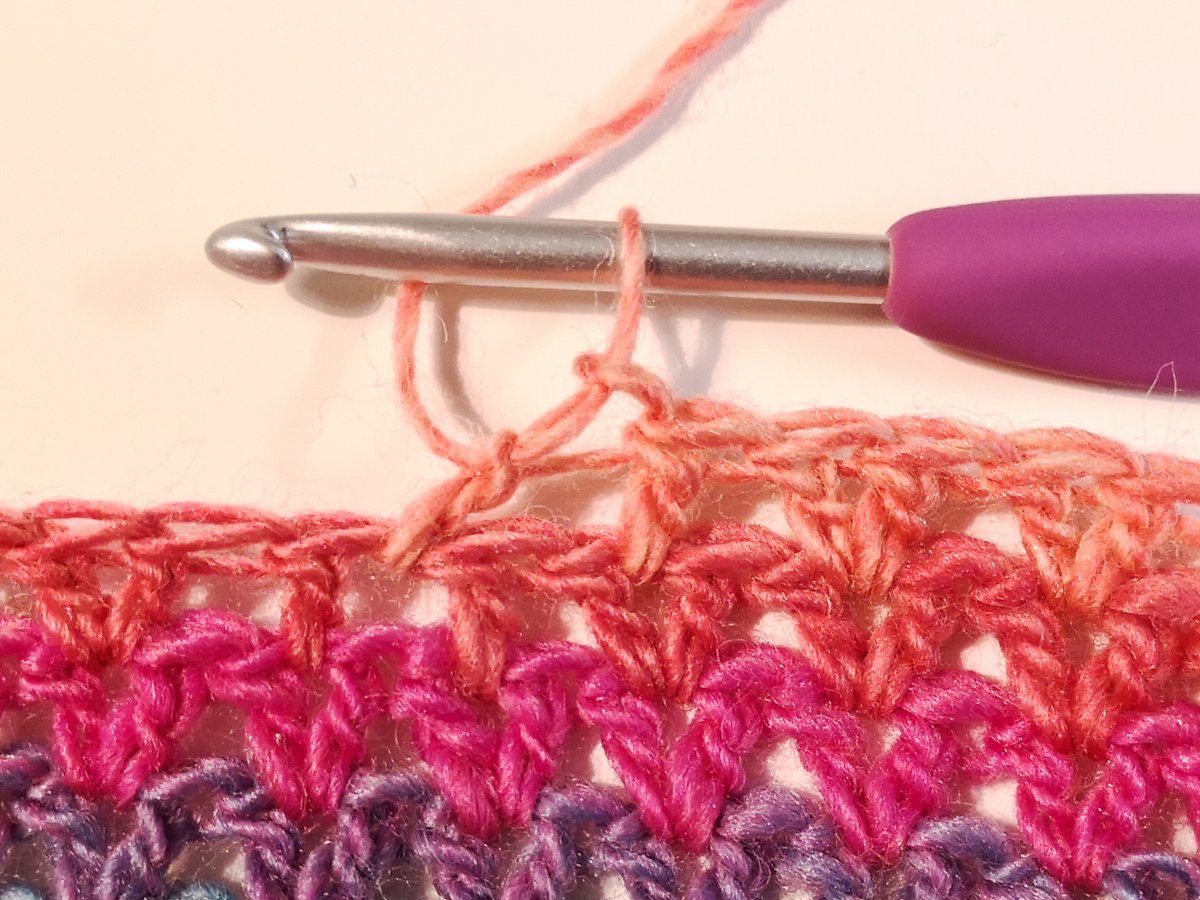
Decrease in Pattern:     


Put hook through next st, pull up a loop, yo twice, put hook through next st, pull up a loop, yo, pull through 2 loops, yo pull through 2 loops, yo, pull through all loops.


Instructions:


With 7/4.5 mm hook ch 7, 8, 10


Row 1:          Sc in second and each ch, turn

Row 2:          Ch1, sc in first st, scblo in next 4, 5, 7 sts, sc in last, turn


Repeat row 2 until you have 76, 84, 92 rows.


Body:

Switch to H/5mm hook

Round 1:       (RS) ch1, sc in each end of row. Join to first sc, changing to Color A, turn.

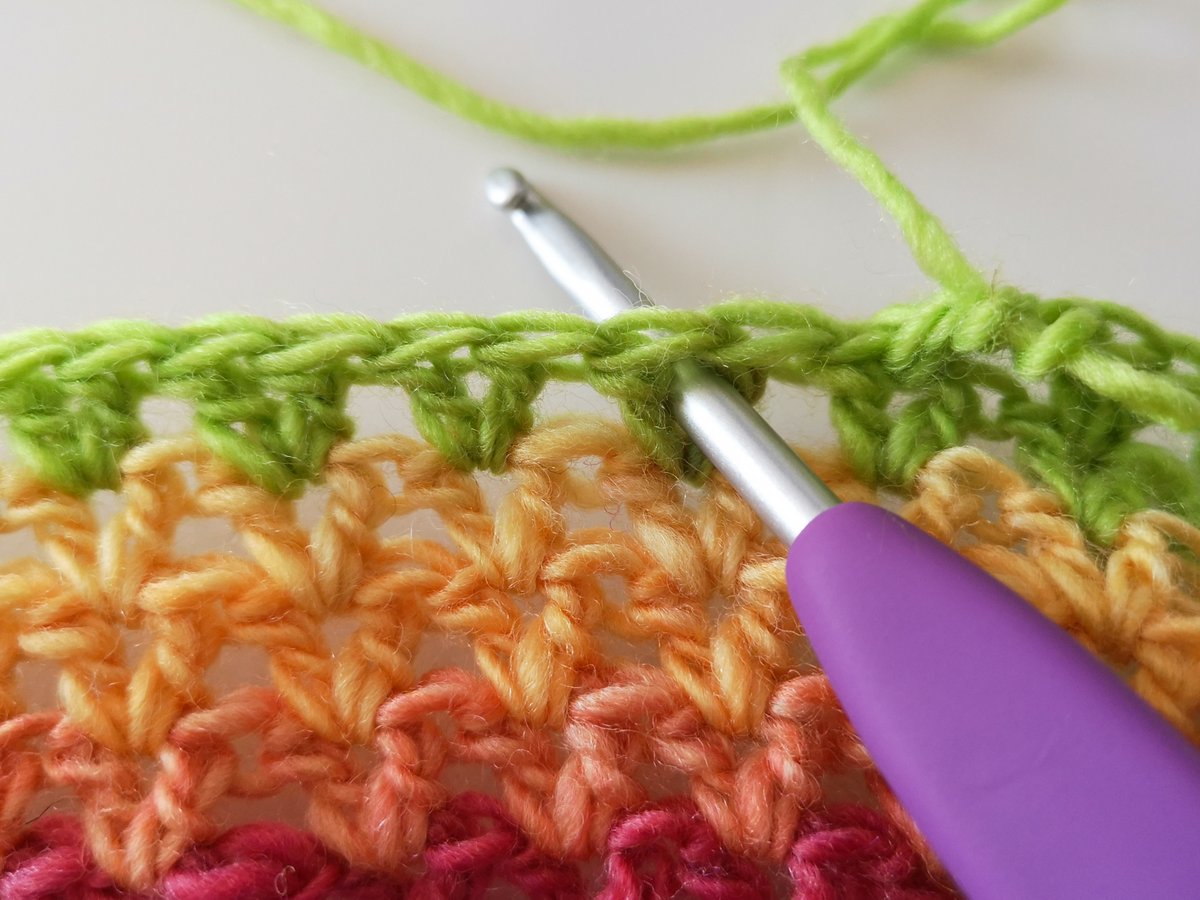
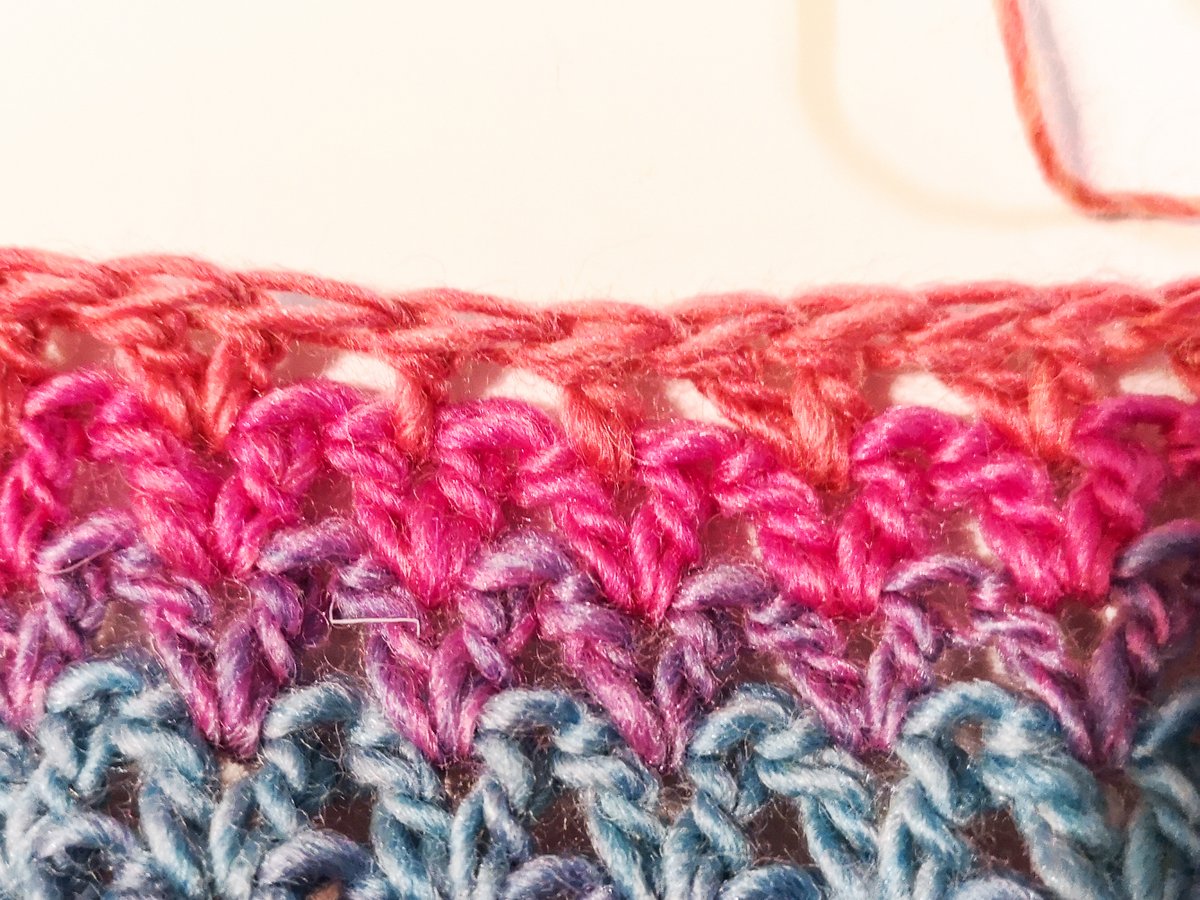
Round 2:       (WS) ch1, (sc 1, tr 1) repeat around, join with MC to first sc, turn

Round 3:       Ch1, sc in each st, join, DO NOT TURN

Round 4:       Ch1, sc in each st, join Color A, turn


Repeat rounds 2-4 seven more times, changing the contrast colors after every other “Round 4”:

Round 5

Color A

Round 8 + 11

Color B

Round 14 + 17

Color C

Round 20 + 23

Color D


After round 25, join Color E.


Toddler:

Round 26:     Ch1, (sc 1, tr 1, dec) repeat around, join MC, turn (57 sts)

Round 25:     Ch1, (sc 1, sc2tog) repeat around, join (38 sts)

Round 27:     Ch1, sc2tog around, join (19 sts)


Cut yarn, weave in through remaining loops and pull hole closed. Weave in/secure all ends.


Child:

Round 26:     Ch1, *(sc 1, tr 1) 2 times, dec; repeat from * around, join MC, turn (70 sts)

Round 27:     Ch1, (sc 3, sc2tog) repeat around, join. (56 sts)

Round 28:     Ch1, (sc 2, sc2tog) repeat around, join Color E, turn (42 sts)

Round 29:     Ch1, (sc, dec) repeat around, join MC, turn (28 sts)

Round 30:     Ch1, sc2tog around, join (14 sts)


Cut yarn, weave in through remaining loops and pull hole closed. Weave in/secure all ends.


Adult:

Round 26:     Ch1, *(sc 1, tr 1) 2 times, sc 1, dec; repeat from * 12 more times, sc 1, join MC,                turn (79 sts)

Round 27:     Ch1, (sc 4, sc2tog) repeat 13 times, sc 1, join (66 sts)

Round 28:     Ch1, (sc 3, sc2tog) repeat 13 times, sc 1, join Color E, turn (53 sts)

Round 29:     (sc 1, tr 1, dec) repeat 13 times, sc 1, join MC, turn (40 sts)

Round 30:     (sc 1, sc2tog) repeat 13 times, sc 1, join (27 sts)

Round 31:     (sc2tog) repeat 13 times, sc 1, join (14 sts)


Cut yarn, weave in through remaining loops and pull hole closed. Weave in/secure all ends.


Attach a pompom if you like.


You’re done 🙂


If you would like to get the downloadable and color coded PDF version of this pattern, you can find it here on Ravelry


I hope you have lots of fun with this pattern, and share with me on Social Media: Tag me and use hashtags #snowdroppearlescent #snowdropcrochet #pearlescenthat to be featured! 

Don’t forget to subscribe! There is a new free hat pattern released every week! 


Have a happy, crafty weekend and until next week!

Emma

Buttercup

Buttercup

People have asked me lately how I come up with so many unique hat patterns. My question is always that inspiration comes from all sides: Nature, pictures, and very often, the yarn! The latter is the case with this week’s pattern 🙂

This week’s hat is a labour of love for me. Lichen and Lace‘s Rustic Heather Sport was the very first hand-dyed, Canadian wool yarn I have ever bought, and only a very special project would do for this. 

It is a single ply yarn and has a nice rustic look and feel. The stitch definition is absolutely gorgeous, making even basic stitches look special. The finished hat is pleasant to wear, and not at all scratchy to my surprise!


The Buttercup beanie features a beautiful design along the side that makes it very unique. It is made of only ONE SKEIN of yarn, so use your good stuff for this one!

Please note that as the instructions take you through each row step by step, they will seem lengthy and laborious. But never fear! This is not a complicated or hard pattern, and I want to make sure you can recreate what my mind made up. LOL

Enjoy this pattern and share your makes with me on Social Media! I know you will love it as much as I do! 

PATTERN:

Size:

Adult (22-23” head circumference)*


Materials:

Yarn: Sport weight yarn.

Sample was made with Lichen and Lace Rustic Heather Sport (100% Wool) in color Pollen (1 skein/56 grams)

Hooks: F/3.75mm & G/4mm

Other: Darning needle to weave in the ends

Abbreviations:

Ch – Chain(s)

Yo – Yarn Over

Chsp – Chain Space

St(s) – Stitch(es)

Sk – Skip Stitch

Slst – Slip Stitch

Sc – Single Crochet

Hdc – Half Double Crochet

Hdcflo – Half Double Crochet Front Loop Only

Hdcblo – Half Double Crochet Back Loop Only

Hdc2tog – Half Double Crochet 2 Stitches Together (decreasing)

Hdc2togflo – Half Double Crochet 2 Stitches Together Through the Front Loops Only

Hdc2togblo – Half Double Crochet 2 Stitches Together Through the Back Loops Only


Special Stitches:

Bobble:       Yo, *put hook around post from right to left, pull up a loop to height of                                           the hook, repeat from * 4 more times, yo, pull through all but the last loop,                                      yo, pull through two loops. Bobble made.

Hdc2tog (A): Yo, put hook through BLO of next st, pull up a loop, yo, put hook through                                             FLO of next st, pull up a loop, yo, pull through all loops.

Hdc2tog (B): Yo, put hook through FLO of next st, pull up a loop, yo, put hook through                                              BLO of next st, pull up a loop, yo, pull through all loops.


Notes:

  • The instructions are lengthy and detailed. Please bear with me while I try to walk you through each row of the design.
  • When working the body of the hat, do not turn. You will be crocheting in the round.
  • Beginning ch 2 counts as a stitch and is the 106th
  • There are special instructions for two different decreases. If you choose, you are welcome to do a simple hdc2tog to decrease, however, following the instructions will provide a very clean finish that matches the pattern of the hat.

How to adjust hat for custom fit:

This hat is easily adjusted by adding or subtracting rows when working the band. Always add/subtract in increments of two stitches.

For every four stitches that are added to the hat (to make it bigger), add one stitch before working the inset design. This way the design stays at the right place. In the same way, for every four stitches that are deducted from the hat, deduct one stitch before working the inset design.


Instructions:


Band:


With 3.75mm hook, ch7

Row 1.         Sc in second and each ch, turn (6sc)

Row 2.         Ch1, sc, scblo 4, sc, turn (6sts)

  1. -106. Repeat row 2.

 Fold band in half and join last worked row to the unworked loops of the beginning ch by slst each corresponding st together.

Turn band so the seam is facing away from you. Switch to 4mm hook.


Body:

Round 1.      Ch2, hdc into next and each side of the band rows. Join to top of ch, DO                                         NOT TURN (106 sts including ch)

Round 2.      Ch2, (hdcblo, hdcflo) 13 times, fpdc, hdcblo 9, fpdc, hdcblo 9, fpdc,                                              (hdcblo, hdcflo) 29 times, join to top of ch

Round 3.      Ch2, (hdcflo, hdcblo) 13 times, fpdc, hdcblo 9, fpdc, hdcblo 9, fpdc,                                              (hdcflo, hdcblo) 29 times, join to top of ch

Round 4.      Ch2, (hdcblo, hdcflo) 13 times, fpdc, hdcblo 8, sk 1, 2fpdc around                                                           next fpdc, hdcblo 9, fpdc,(hdcblo, hdcflo) 29 times, join to top of ch

Round 5.      Ch2, (hdcflo, hdcblo) 13 times, fpdc, hdcblo 7, sk 1, (fpdc, hdcblo) all into                                     next fpdc, 2fpdc around next fpdc, sk1, hdcblo 8, fpdc, (hdcflo, hdcblo)                                          29 times, join to top of ch

Round 6.      Ch2, (hdcblo, hdcflo) 13 times, fpdc, hdcblo 6, sk1, (fpdc, hdcblo) all into                                                next fpdc, hdcblo, fpdc, (hdcblo, fpdc) all into next fpdc, sk 1, hdcblo 7,                                          fpdc, (hdcblo, hdcflo) 29 times, join to top of ch

Round 7.      Ch2, (hdcflo, hdcblo) 13 times, fpdc, hdcblo 5, sk 1, (fpdc, hdcblo) all into                                     next fpdc, hdcblo2, fpdc, hdcblo, (hdcblo, fpdc) all into next fpdc, sk1,                                            hdcblo 6, fpdc, (hdcflo, hdcblo) 29 times, join to top of ch

Round 8.      Ch2, (hdcblo, hdcflo) 13 times, fpdc, hdcblo 4, sk 1, (fpdc, hdcblo) all into                                     next fpdc, hdcblo 3, fpdc, hdcblo 3, (hdcblo, fpdc) all into fpdc below, sk1,                                     hdcblo 4, fpdc, (hdcblo, hdcflo) 29 times, join to top of ch

Round 9.      Ch2, (hdcflo, hdcblo) 13 times, fpdc, hdcblo 3, sk 1, (fpdc, hdcblo) all into                                     next fpdc, hdcblo 3, sk 1, 2 fpdc around next fpdc, hdcblo 5, bobble                                               around fpdc below, sk1, hdcblo 3, fpdc, (hdcflo, hdcblo) 29 times, join to                                        top of ch

Round 10.    Ch2, (hdcblo, hdcflo) 13 times, fpdc, hdcblo 2, sk 1, bobble around fpdc                                        below, hdcblo into same fpdc, hdcblo 3, sk1, (fpdc, hdcblo) all into next                                          fpdc, hdcblo, fpdc, hdcblo 9, fpdc,  (hdcblo, hdcflo) 29 times, join to top                                        of ch

Round 11.    Ch2, (hdcflo, hdcblo) 13 times, fpdc, hdcblo 6, sk 1, (fpdc, hdcblo) all into                                     next fpdc, hdcblo 2, 2 fpdc around next fpdc, sk1, hdcblo 8, fpdc,  (hdcflo,                                     hdcblo) 29 times, join to top of ch

Round 12.    Ch2, (hdcblo, hdcflo) 13 times, fpdc, hdcblo 5, sk 1, bobble around fpdc                                        below, hdc into same fpdc, hdcblo 3, fpdc, (hdcblo, fpdc) all into next fpdc,                                     sk1, hdcblo7, fpdc, (hdcblo, hdcflo) 29 times, join to top of ch

Round 13.    Ch2, (hdcflo, hdcblo) 13 times, fpdc, hdcblo 8, sk1, (fpdc, hdcblo) all into                                                next fpdc, hdcblo, (hdcblo, fpdc) all into next fpdc, sk1, hdcblo 6, fpdc,                                           (hdcflo, hdcblo) 29 times, join to top of ch

Round 14.    Ch2, (hdcblo, hdcflo) 13 times, fpdc, hdcblo 8, fpdc, hdcblo 3, (hdcblo,                                         bobble) all into next fpdc, sk1, hdc 5, fpdc, (hdcblo, hdcflo) 29 times, join                                                to top of ch

Round 15.    Ch2, (hdcflo, hdcblo) 13 times, fpdc, hdcblo 8, fpdc, hdcblo 10, fpdc,                                            (hdcflo, hdcblo) 29 times, join to top of ch

Round 16.    Ch2, (hdcblo, hdcflo) 13 times, fpdc, hdcblo 8, fpdc, hdcblo 10, fpdc,                                            (hdcblo, hdcflo) 29 times, join to top of ch

Round 17.    Ch2, (hdcflo, hdcblo) 13 times, fpdc, hdcblo 8, bobble around fpdc below,                                                hdcblo 10, fpdc, (hdcflo, hdcblo) 29 times, join to top of ch

Round 18.    Ch2, (hdcblo, hdcflo) 13 times, fpdc, hdcblo 19, fpdc (hdcblo, hdcflo) 29                                                 times, join to top of ch

Round 19.    Ch2, (hdcflo, hdcblo) 13 times, fpdc, hdcblo 19, fpdc, (hdcflo, hdcblo) 29                                      times, join to top of ch


Rounds 20.-23. Repeat rounds 18-19 two more times.


Round 24.    Ch2, [hdcflo, hdblo, hdflo, hdc2tog (A), hdcblo, hdcflo, hdcblo, hdc2tog                                        (B)] 2 times, hdcblo, hdcflo, hdcblo, hdc2tog (B), hdcflo, fpdc, hdcblo,                                           hdcblo2tog (hdcblo 3, hdcblo2tog) 3 times, hdcblo, fpdc, hdcblo, hdc2tog                                                 (B), [hdcflo, hdblo, hdflo, hdc2tog (A), hdcblo, hdcflo, hdcblo, hdc2tog                                          (B)] 5 times, hdcflo, hdblo, hdflo, hdc2tog (A), join to top of chain

Round 25.    Ch2, [hdcflo, hdcblo, hdc2tog (B)] 5 times, hdcblo, fpdc, hdcblo2tog,                                             [hdcblo 2, hdcblo2tog] 3 times, hdcblo, fpdc, [hdcflo, hdcblo, hdc2tog                                           (B)] 11 times, join to top of ch

Round 26.    Ch2, [hdcblo, hdc2tog (A)] 5 times, hdcflo, fpdc, hdcblo, [hdcblo,                                                           hdcblo2tog] 3 times, hdcblo, fpdc, hdcflo, [hdcblo, hdc2tog (A)] 11 times,                                      join to top of ch.

Round 27.    Ch2, [hdc2tog (B)] 5 times, hdcflo, fpdc, hdc2togblo 4, fpdc, [hdc2tog                                           (A)] 11 times, hdcblo, join to top of ch.


Cut yarn leaving a long tail. Weave tail in through remaining loops and pull hole closed gently (This yarn breaks easily!) Secure/weave in all yarn tails.


Block hat for best results and fit.


You’re done!


If you would like to get the downloadable PDF version of this pattern, you can find it here on Ravelry.

I hope you have lots of fun with this pattern, and share with me on Social Media: Tag me and use hashtags #snowdropbuttercup #snowdropcrochet #buttercuphat to be featured! 

Don’t forget to subscribe! There is a new free hat pattern released every week! 


Have a happy, crafty weekend and until next week!

Emma

So Boho

So Boho

Can you believe it is EASTER next week?! I certainly can’t! I had this picture in my head where I would sew Easter outfits for all four kids (and maybe even myself), and make handmade gifts for them… And there is still a part of me who wants that to work out. The stubborn part, that will stay up all night to finish a project last minute (always last minute) because she said she would do it. LOL Who am I kidding!

This little project of designing and publishing a hat every week for this whole year definitely makes me realize how fast time flies. I mean, the year is almost 1/3 gone! Mind. Blown.


This weeks hat was such a fun one to crochet, photograph, and edit. Even though it is made using fingering weight yarn, the double crochets make for a quick project. The color change in the yarn just makes it super fun and addicting! Make yourself a rainbow or choose a subtle, single colored yarn, this pattern can be something for everyone! 

For this hat, I used one skein of KnitPicks Chroma Fingering Weight yarn. I have had this for a while, and was waiting for the right project for it. People who know me know that I am not typically the “wear the rainbow” type of gal, but when I designed this Boho Hat, I sure was glad I had it! It is the perfect yarn for this, don’t you think?

Now there are at least three more projects in my head that would be perfect for this yarn! Can’t wait to get more 🙂


So, enough babbling, here is the pattern: 


Size:

Adult (22-23” head circumference)

How to adjust for different sizes:

Add or subtract to the beginning chain the number of stitches you need to fit it comfortably around your hat. If you only have a measurement, add chains until it is about an inch shorter than the wearers head circumference. This pattern will work for any stitch count that is EVEN numbered. Remember that wool is very stretchy, and even if your band turns out tight (like mine did), this is easily fixed at the blocking stage.


Gauge: 5 clusters/6.5 rows in 2”


Materials:

Yarn: Fingering weight yarn.

Sample was made in KnitPicks Chroma Fingering (70% Wool, 30% Nylon)(396 yards/100grams) Colorway Groovy (1 skein)

Hooks: F/3.5mm & G/4mm

Other: Darning needle to weave in the ends


Abbreviations:

Ch – Chain(s)

Chsp – Chain Space

St(s) – Stitch(es)

Sk – Skip Stitch

Slst – Slip Stitch

Sc – Single Crochet

Dc – Double Crochet


“Cluster”: dc 2 into sp indicated.


Notes:

  • Ch3 in the beginning of the row is counted as a stitch and as part of a cluster;
  • Ch3 and the last dc of the round are one cluster;
  • Always join with a slst into the 3rd loop of beginning chain;
  • “2 dc (cluster) into cluster below”: Work the cluster in between the two dc of the cluster below;

Instructions:

Band:

With 3.5mm hook, ch110. Join to first ch, being carefull not to twist the chain.

Round 1.      Ch1, sc in each ch, join to first sc. (110 sts)

Round 2.      Ch1, sc in same st, ch1, sk1, (sc in next, ch1, sk1) repeat around, join to                                         first sc.

Round 3.      Ch1, (sc in next ch1sp, ch1) repeat around, join to first sc.

Round 4. + 5. Repeat row 3.


Body:

Switch to 4mm

Round 6.      Ch3, (sk1 st, 2 dc in next chsp) repeat around, dc1 in last chsp, join to top of beginning                             ch. (55 clusters)

Round 7.      Ch3, [2 dc (cluster) into cluster below] repeat around until last cluster, dc between last dc                    and ch of previous round, join to top of ch.


Repeat round 7 until body has 25 rows and hat is about 9” long (including band).


Decrease:

Round 1.      Ch3, [(2 dc (cluster) into cluster below) 3 times, (1dc into next cluster) 2 times] repeat                            9 more times, (2 dc (cluster) into cluster below) 3 times, 1 dc in next cluster, join to top                          of ch.

    Round 2.      ch3, [(2 dc (cluster) into cluster below) 2 times, 1dc into next cluster, 1 dc in between                      next 2 dc] repeat 9 more times, (2 dc (cluster) into cluster below) 2 times, 1 dc in next                    cluster, join to top of ch.

    Round 3.      ch3, [(2 dc (cluster) into cluster below) 1 time, 1dc into next cluster, 1 dc in between                       next 2 dc] repeat 9 more times, (2 dc (cluster) into cluster below) 1 time, 1 dc in next                      cluster, join to top of ch.

    Round 4.      Ch3, [1 dc into next cluster, 1 dc between next 2 dc] repeat around, join to top of ch.


    Cut yarn, leaving a long tail. Weave yarn end through remaining stitches, pull hole closed and secure/weave in all ends.


    Block your hat for best results. Careful not to stretch the band beyond your head circumference!


    You’re done 🙂

    If you would like to get the downloadable and color coded PDF version of this pattern, you can find it here on Ravelry.

    I hope you have lots of fun with this pattern, and share with me on Social Media: Tag me and use hashtags #snowdropsoboho #snowdropcrochet #sobohobeanie to be featured! 

    Don’t forget to subscribe! There is a new free hat pattern released every week! 


    Have a happy, crafty weekend and until next week!

    Emma

    Disclaimer: This post contains affiliate links.

    This means that at no additional cost to you, I might earn a small commission if you choose to click through and make a purchase. 

    Granny’s Favorite Hat

    Granny’s Favorite Hat

    Happy Friday Friends!

    So, yesterday the kids were arguing whether it was winter or spring. You see, their argument was valid and both of them had good points. For example, it is April and we are not in Australia, so it *should* be spring. On the other hand, it was -13 degrees C, windy and it’s been snowing for days; clear signs of winter!

    I had a hard time settling this myself! LOL. In the end, we decided that technically it is spring, but in the North, spring looks a lot like the beginning of winter… that seemed to be sufficient for them 😀 

    Never did I know how many of such….. arguments I would have to settle as a mom. It is truly amazing to watch and experience how a new person tries to make sense of everything in their world. 

    So, this week’s pattern for you is a granny circle (square, stripes, whatever) hat! It is made of cotton yarn, so it is perfect as a spring/summer hat. I used KnitPicks Comfy Sport for this, but realized after the fact that they appear to have discontinued it….. Why, KnitPicks, why! Do not despair, though, because the Shine is absolutely beautiful as well and works for this pattern just fine! 

    The best part of this hat, in my opinion, is the sweet “flower” on top. So pretty! 


    PATTERN: 

    Sizes:


    Toddler (18-19” head circumference)

    Child (20-21” head circumference)

    Adult (22-23” head circumference)


    Gauge: 8dc rows/6 clusters (5 ch sp) in 4”


    Materials:


    Yarn: Sport weight cotton yarn.

    Sample was made in KnitPicks Comfy Sport (75% Cotton, 25% Acrylic in colors Peonie, Whisker, Ivory (A, B, C) (1 skein per color)

    Hooks: G/4mm (or size needed to obtain gauge)

    Other: Darning needle to weave in the ends

    Abbreviations:

    Ch – Chain(s)

    St(s) – Stitch(es)

    Sk – Skip Stitch

    Slst – Slip Stitch

    Sc – Single Crochet

    Hdc – Half Double Crochet

    Dc – Double Crochet

    Sp – Space


    Cluster: dc3tog


    Notes:

    • Tutorial pictures are for a child sized hat;
    • When joining at the end of a round, always join into the top of the cluster, NOT the chain:

    Instructions:

    Crown:

    With Ivory (color A), ch6, join with slst into first ch. You will crochet into the ring you just formed.

    Round 1:      Ch3, dc2tog into ring (counts as dc3tog), (ch3, dc3tog into ring) repeat 4 more                                times, ch1, hdc into top of cluster (NOT the beginning ch). (6 clusters)

    Round 2:      Ch3, dc2tog into sp formed by hdc (counts as dc3tog), *ch3, (dc3tog, ch3,                                                dc3tog) into next sp; repeat from * 4 more times, ch3, dc3tog into last sp (same                                    sp as the beginning cluster), ch1, hdc into top of cluster. (12 clusters)

    Switch to Peonie color (color B)

    Round 3:      Ch3, dc2tog into sp formed by hdc (counts as dc3tog), * ch3, (dc3tog, ch3,                                              dc3tog) into next sp, ch3, dc3tog into next sp; repeat from * 4 more times, ch3,                                    (dc3tog, ch3, dc3tog) into next sp, ch1, hdc into top of cluster. (18 clusters)


    Switch to Ivory (color A)


    Stop increasing here for Toddler size.


     Round 4:      Ch3, dc2tog into sp formed by hdc (counts as dc3tog), ch3, dc3tog into next sp,                                     *ch3, (dc3tog, ch3, dc3tog) into next sp, [ch3, dc3tog into next sp] 2 times;                                             repeat from * 4 more times, ch3, (dc3tog, ch3, dc3tog) into next sp, ch1, hdc                                           into top of cluster. (24 clusters)

    Switch to Whisker (color C)


    Stop increasing here for Child size.


    Round 5:      Ch3, dc2tog into sp formed by hdc (counts as dc3tog), [ch3, dc3tog into next sp]                            2 times, *ch3, (dc3tog, ch3, dc3tog) into next sp, [ch3, dc3tog into next sp] 3                                           times; repeat from * 4 more times, ch3, (dc3tog, ch3, dc3tog) into next sp, ch1,                                     hdc into top of cluster. (30 clusters)


    Switch to Peonie (color B)


    Stop increasing here for Adult size.


    Body:

    Round 1:      Ch3, dc2tog into sp formed by hdc (counts as dc3tog), *ch3, dc3tog into next sp;                                    repeat from *16 (22, 28)times, ch1, hdc into top of cluster. (18, 24, 30 clusters)

    Repeat round 1 of body 9 more times. (Work 8th row in Ivory if you wish.)


    Band:

    Round 1: ch1, sc into each cluster and 3 sc into each ch3sp, join to first sc. (shown in grey for clarity)

    Switch to Whisker (color C)

    Round 2:      Ch1, sc into each st, join

    Switch to Ivory (color A)

    Round3:       Ch1, sc into each st, join.


    Cut yarn, weave in all ends.


    You’re done 🙂 


    If you would like to get the downloadable and color coded PDF version of this pattern, you can find it here on Ravelry.

    I hope you have lots of fun with this pattern, and share with me on Social Media: Tag me and use hashtags #snowdropgrannysfavorite #snowdropcrochet #grannysfavoritehat to be featured! 

    Don’t forget to subscribe! There is a new free hat pattern released every week! 


    Have a happy, crafty weekend and until next week!

    Emma

    Pin It on Pinterest